Reviewing your Humminbird Side Images “offline”

  • jhalfen
    Posts: 4179
    #1294863

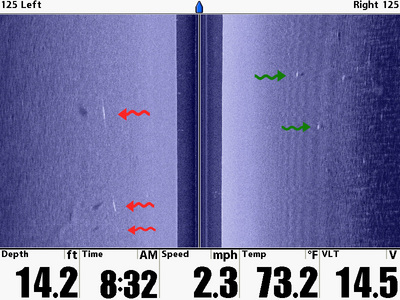
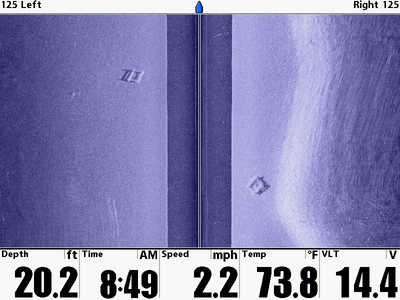
    One of the things I have found this summer, after taking 100s (and 100s!) of screen captures from my Humminbird 997 and 1197 is that I learn an INCREDIBLE amount by reviewing them carefully once I’m off the water. I’ve trained myself to take a screen capture (which is exceptionally easy to do) anytime I see something vaguely interesting when I’m on the water. Chances are that the image I capture will end up containing much more than I originally identified. I think we so caught up in looking at one cool part of the screen, that we miss all of the cool things happening in other parts.

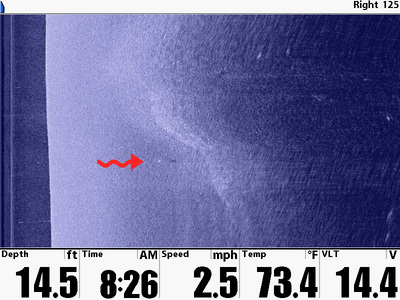
    Here are a few examples from recent trips. This first one is a breakline from 3-4 feet down to 14-15 feet. The drop itself is the slightly brighter portion of the picture, with shallow water to the right and deeper water to the left of the break.

    Ok, now what’s the cool thing that I missed while on the water…

    …the fish (marked by the squiggly red arrow; check out his shadow between the fish and the break) sitting just off the inside turn, right where he’s supposed to be. I was so focused on how well that the 1197 imaged the breakline, that I missed the fish!

    jhalfen
    Posts: 4179
    #800876

    Here’s another that focuses on fish. I imaged a few fish on the deep portion of this 14 foot flat; these 3 fish are marked with red squiggly arrows. I took the screen capture, and in reviewing it later, also saw fish (marked with green squiggly arrows) sitting in the shallow portion of the flat on the right. Completely missed those shallow fish while on the water!

    jhalfen
    Posts: 4179
    #800882

    Here’s a structure-related screen capture. I initially took this picture because of how well the 1197 imaged the two cribs that are out towards the middle of the image, in 20-ish feet of water. What I missed was how well the 1197 also imaged the breaklike (the brighter portion of the image on the right hand side), where the depth changes from 4-5 feet on the far right down to 20-ish at the base of the break. Understanding how these cribs are positioned relative to the breakline will be a key to targeting crappies there through the ice this winter (not to mention the fact that the cribs have their own waypoints now, stored neatly now within my Humminbird Interlink).

    jhalfen
    Posts: 4179
    #800883

    A bit about collecting screen captures:

    There are two SD card slots in my 997 and 1197. I have a mapping chip in one, and a blank SD card in the other. The HB units are smart enough to know which card to write to, and which one to leave alone.

    Recording images is easy. Very easy. First, you enable the screenshot mode on the main menu. Second, when you have an image displayed that you want to write to the card, you press the “mark” button. This writes the image to the card…takes 2 or 3 seconds at most. At the end of the day, I pull the SD card out, stick it in my laptop (which has a built-in SD card reader), and copy the images to my PC. The images are in .png format, ready to view with any common photo viewing/editing software.

    IDO member “whittsend” posted a nice link the other day that will help convert the .png images to .jpg images. Some IDO users are apparently unable to post their screen captures as .png files, so you might try Mike’s link if you’re in that particular boat:

    Converting PNG to JPG files

    haasjj
    Cordova, IL
    Posts: 373
    #800789

    Thanks for the tutorial. I’ve had mine for a year now and I enjoy reading your posting. It’s an incredible tool. I just hope my tournament buddies continue to be too stingy for years to come.

    whittsend
    Posts: 2389
    #801206

    “Awesome post as usual, Jason. I seem to also find “extras” when I go back and look at them.. Should probably take more screenshots than I have been, I’ll work on that. Always enjoy seeing your screenshots – thanks!!!

    Mike

    Randy Wieland
    Lebanon. WI
    Posts: 13297
    #801218

    Jason, just to add a bit to help the newest H-bird guys shorten their learning curve. Last year was my first full year of running my 1197. When I marked shots, I would do multiple screen shots back to back in different modes. Not only did I use the split screen for side & 2d, but mark both in full screen. For guys that are so accustom to the 2D, it gives very detailed images to compare side by side. I also took a lot of screen shots at different speeds. That way I could go back and view the clarity of my 2D readings at 5,10, 20…55mph My set up has a Y cable with the surf board mounted externally off the back and a puck glassed in the rear hull. By going back and looking carefully at the images, I learned that from 25 to 40 mph my boat has a lot of clutter by the way it breaks the plane of the water. But it clears up pretty good after 40.So now I know when I mark scattered fish suspended at WOT, I turn around and start fishing. At the mid-range speeds, I know to look for a different “look” to suspended fish. It also helps in recognizing the differences in the thermocline.

    Another thing to do is take screen shots while your verticle jigging. You can learn a lot by marking your jigging habits

Viewing 9 posts - 1 through 9 (of 9 total)

You must be logged in to reply to this topic.