The MinnKota i-Pilot has landed!

  • jhalfen
    Posts: 4179
    #1237612

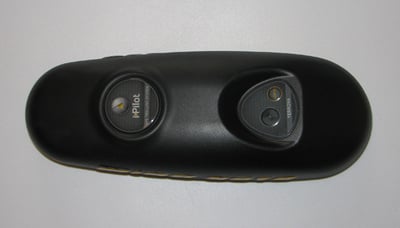
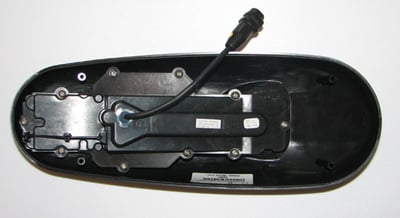
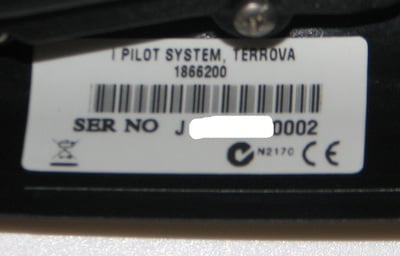
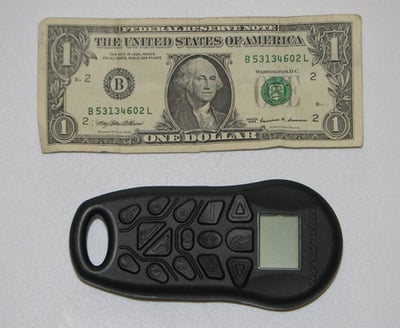
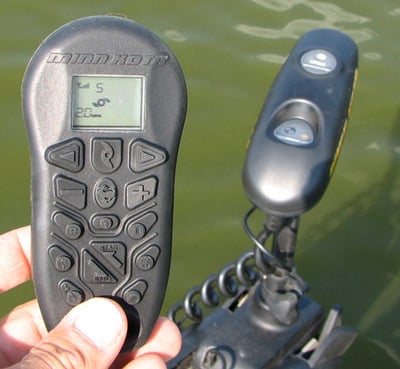
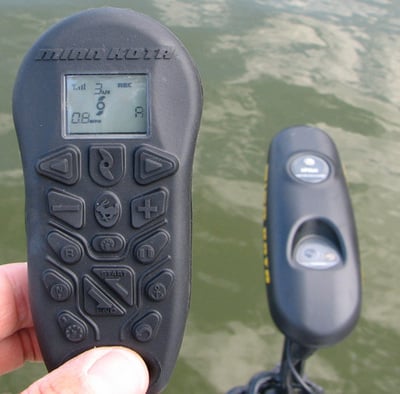
    I have a unique opportunity to be able to run a MinnKota i-Pilot on my Terrova 101 in advance of the i-Pilot’s general release to the market. My i-Pilot arrived today!

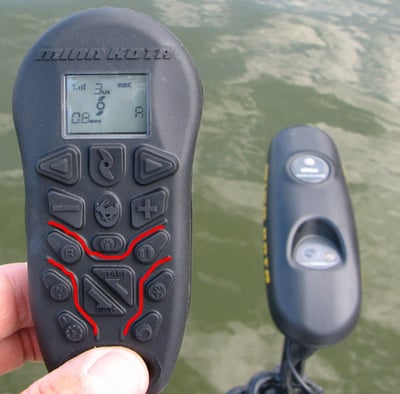
    I’m going to use this thread to acquaint the iDoFishing.com audience with the unit, its installation, features, and on-the water capabilities. It will be a work in progress as I acquaint myself with the unit, so be sure to check back regularly over the next couple of weeks. Also, if you’re planning to attend the FLW Walleye League Championship in Chippewa Falls, WI this week, be sure to track me down for an individual i-Pilot orientation on my boat.

    If your first question is, “Just what the heck is an i-Pilot anyways,” check out this link:

    MinnKota i-Pilot information

    If you have other questions about the i-Pilot as we go along, please fire away, by PM here on the site or by e-mail to [email protected]. Thanks!

    jhalfen
    Posts: 4179
    #803899

    Head Unit

    The brains of the i-Pilot are contained within a head unit that replaces the top half of my Terrova’s head. The head unit contains the integrated GPS receiver and all of the electronics required to control the Terrova’s steering and thrust. Here are a few pics of the head unit itself, before installation.

    The primary linkage between the guts of the Terrova and the i-Pilot is a single, insulated plug that you can see hanging over the top of the unit in the second photo.

    The third photo shows a portion of my i-Pilot’s serial number. Feels kinda fun to be driving i-Pilot #2!


    jhalfen
    Posts: 4179
    #803900

    Remote

    Users will control all i-Pilot functions with a hand-held, floating, fully-sealed remote. Here are some pics of the remote. More information about the remote’s functions will be in the way soon, as soon as I install the unit.

    The remote is quite light, lighter than I expected. It weighs about as much (or perhaps less than) a typical remote control for your TV.

    The third pic shows the guts of the remote, accessed by removing the 6 Phillips screws from the back of the unit. This makes the battery accessible for easy replacement.

    Now, off to install the unit on my Terrova!


    jhalfen
    Posts: 4179
    #803905

    Terrova installation

    Installing the i-Pilot onto my Terrova was ridiculously easy. It took, perhaps, 5 minutes, including the time needed to take the pictures below. It’s clear to me that the engineers at MinnKota had the Terrova in mind when they designed the i-Pilot.

    Step 1. Disconnect power to the trolling motor.

    Step 2. Remove the cover to the head unit by unscrewing the four screws found on the underside of the trolling motor’s head.

    Step 3. This exposed the components found in the head unit. If you have an autopilot (like I did), then the autopilot must be disconnected and removed.

    Step 4. Unseat the autopilot from the head unit, and disconnect it from the motor’s electronics (unplug one plug, and you’re done).

    Step 5. Into that plug that used to contain the autopilot, plug in the i-Pilot. 2 very satisfying clicks on the way in, just as advertised in the i-Pilot manual.

    Step 6. Attach the i-Pilot to the remainder of the motor using the four original screws.

    I verified a successful installation by deploying the motor…3 quick little chirps means that all is well.

    Now, it’s time to take it out on the water. So, off to a little nearby lake that’s hosting a walleye tournament next weekend. More when I return!


    absolute2ks
    Chippewa Falls, WI
    Posts: 674
    #803933

    Where is mine? I want one too Well I will just steal yours after the weigh in Sounds like I might have to fish for you anyways If mom and the little one does not cooperate.

    jhalfen
    Posts: 4179
    #804121

    First impressions on the water

    I had a chance to use my i-Pilot for the first time this weekend. The more I use it, the more situations I think of where the i-Pilot and its GPS-enabled functions will become central to my boat control and bait presentation.

    I’ll start the discussion by talking about some features that current Co-Pilot owners will find very familiar. The i-Pilot’s co-pilot features (basic direction and speed control) are at the top of the remote. Check out the first picture for a look at the remote itself, and the second picture to see the co-pilot speed and steering controls.

    The left and right steering arrows are self-explanatory. In the middle of this section of buttons is the prop button: one push to turn the prop on, a second push to turn it off. The plus and minus buttons incrementally change the speed of the propeller. Below the prop button is the jackrabbit key, which increases motor thrust to maximum; below the jackrabbit key is the backlight key, which makes the display readable at night.

    One evolutionary step I noticed right away is that the basic speed control is tunable in 1/2-unit steps. In other words, speeds can be set at 1, 1.5, 2, 2.5, 3, etc. This finer degree of speed control will be wonderful for dialing in a precise motor speed for finesse bait presentations; wintertime jig dragging on the river comes immediately to mind. The third photo shows the remote’s display, with this half-increment speed (2 1/2) noted above the propeller. More on the display below.


    jhalfen
    Posts: 4179
    #804155

    Let’s go back to the i-Pilot remote’s display, shown in detail below. A lot of information can be presented on the display; we’ll go through all of the icons as they present themselves during this orientation.

    In the upper left is the GPS signal strength, measured in bars like on a cell phone. The i-Pilot requires at least one bar of signal strength for its GPS-enabled functions to work. The standard co-pilot steering and power controls are not GPS dependent, so they’ll work well in areas where signal strength is low, like in a steep canyon or an area that is near a heavy leaf canopy.

    To the right of the signal strength indicator is the current motor power setting. It ranges from 1-10, in half-unit increments. In this picture, the motor is on power setting #5.

    Below the power indicator is a propeller icon. This icon spins when the motor is running.

    In the lower left is the current GPS speed. It is completely accurate, when checked against the Humminbird GPS that I have mounted at the bow. Having this GPS speed in the remote is a tremendous advantage. Since you can be anywhere in the boat while controlling the bowmount, you need not be anywhere near a fixed locator screen in order to check your speed. This GPS speed is the heart of the i-Pilot “Cruise Control” function that we’ll discuss in the near future.

    crossin_eyes
    Lakeville, MN
    Posts: 1339
    #804413

    Jason,

    Fantastic information and tutorial! I can’t wait for them to be released, as it will absolutely be the next piece of equipment that goes on my 1880!

    Mike

    jhalfen
    Posts: 4179
    #804593

    Track Record

    This afternoon, I took a break from fishing to test the first of i-Pilot’s GPS enabled functions: Track Record. The track record function allows i-Pilot to record GPS position data in the form of a set of “track points” while the boat is underway (when powered by the bowmount; a Terrova in this case), and then retrace the track from beginning to end, or from end to beginning, as many times as the user likes.

    i-Pilot can record up to three separate tracks, each up to 2 miles in length. When retracing a GPS track, i-Pilot controls the steering of the motor. Speed is not recorded by the Track Record function, only position; speed can be set and adjusted manually, or controlled using the i-Pilot “Cruise Control” function.

    The track record functions are controlled by the i-Pilot remote. The first picture is of the remote while I was recording a track (more on that later). The second picture highlights that portion of the remote control that is used for Track Record. The final picture shows this region of the remote in more detail. Only a few buttons are needed to use the track record function: the record button (R) in the upper left, the pause button in the upper right, and two arrow buttons in the middle…return to start and return to end, where start (first recorded track point) and end (last recorded track point) refer to the two termini of the recorded track.


    jhalfen
    Posts: 4179
    #804598

    Track Record, part 2

    To start recording a track, the user presses the “R” button once. Doing so allows the user to select a memory location for the track (A, B, or C) using the + and – keys that normally control speed. A selection must be made within 3 seconds, otherwise i-Pilot will record the track in whichever memory location is currently displayed on the remote. When a recording is being made, “Rec” is present on the i-Pilot remote’s display, as well as the memory location (memory location A, in this case). When I took this picture, I had 4 “bars” of GPS signal strength, my motor power setting was 3.5 (top, center), my GPS speed was 0.8 mph (lower left).

    As I noted above, speed is not recorded by Track Record, only position. Motor speed can be adjusted at any time while the track is being recorded. I clipped along at a fair pace during this trial, and even checked the i-Pilot’s speed against that determined by my Humminbird 997. As you can see in the second picture, the speed correlation is perfect.

    jhalfen
    Posts: 4179
    #804602

    Track Record, part 3

    After recording a track, I wanted to see how accurate i-Pilot would be in playing back the recorded track…or, in other words, how close to the original track I would be when I pressed the “Track to start” or “Track to end” arrow keys.

    So, I wandered a short distance away from the track, and pressed the “Track to start” arrow key. Under these circumstances, i-Pilot moves directly to the nearest track point, and then follows the recorded track points back to the first point (or the last, if I had pressed the “Track to end” arrow key).

    In short, i-Pilot did a great job of returning to the track and then following the track back to its first track point (the start). Once i-Pilot arrived at that point, it turned the motor power off, rather than continuing to drive right through it. What a great feature!

    Rather than asking you to just believe me that i-Pilot does a great job at following a recorded track, take a look at the screen capture from my Humminbird 997 shown below (first picture). I took this screen capture after i-Pilot had returned me to the start of the recorded track. Let me decode the screen capture for you (second picture): I began to record the track at the blue arrow. I made a few turns and stopped recording the track at the green arrow. My recorded track is the lower of the two paths in the screen capture. Then, I moved the boat off the track (to the red arrow), and pressed the “Track to start” arrow. Look at what i-Pilot did: it moved back to the nearest recorded track point, then followed the recorded track right back to the first recorded point (just behind the boat icon). i-Pilot’s path back to the beginning of the recorded track is the upper path in the screen capture. Not bad!!! Note the distance scale from the screen capture; the deviation from the original recorded path is quite small. It looks like it’s under 10 feet for most of the “playback” track…right about the normal GPS position accuracy that I normally see with my Humminbird 997c (7-10 feet).

    jhalfen
    Posts: 4179
    #804607

    Track record, part 4

    Ok, we’ve recorded a track, we’ve replayed the recorded track to the beginning….let’s have i-Pilot turn us around and replay the track again, from beginning to end.

    One press of the “Track to end” arrow key, a speed adjustment with the + or – keys, and we’re off. You can see what the i-Pilot remote displays while playing back the recorded track in the first picture; a down-pointing arrow with the word “end” is displayed in the middle of the screen, along with my GPS speed (lower left), GPS signal strength (upper left), motor power setting (7), and the memory location for the recorded track (A).

    How did i-Pilot do on this second pass, following the original track from beginning to end? Great, just as it did when playing the track from near the end back to the beginning. My Humminbird 997 screen capture, shown in full and zoomed in below, tells the whole story. I took that screen capture after i-Pilot had turned the motor off upon arriving at the end of the recorded track; note that I’m coasting from the speed I was running while the track was playing (2.0 mph) down to (and through) 0.7 mph now that the motor is turned off.


    jhalfen
    Posts: 4179
    #804610

    Track record….the last part (for now)

    One use of Track Record and I’m thoroughly impressed. Think about all of the uses for this sort of feature while you fish. Do you like to cast weedbeds? Pull spinners over open water? Follow precise contours of a mudflat while rigging live bait? Cast shorelines? I could go on and on…

    Track record is true “set and forget” steering control for your MinnKota bowmount. Set your path with Track Record, and then forget about controlling your boat after that. i-Pilot will take care of the boat control while you focus on setting the hook.

    Tom P.
    Whitehall Wi.
    Posts: 3452
    #804626

    Great writeup Jason way COOL.

    It would be even sweeter if the i-pilot would hook into the depth finder GPS system and pull routes and waypoints from there. Now that would be the ultimate in my book…just think of the possiblities.

    fireman731
    Miles, Iowa
    Posts: 574
    #805181

    Too bad it doesn’t track a certain depth or distance from shore and allow you to record that GPS trail . Wish I could combine the I-pilot with my Pinpoint…now that would be a unit that did everything !

    jhalfen
    Posts: 4179
    #787798

    Spot Lock

    With the FLW league championship now in the past, I had a chance to spend some time working with the i-Pilot’s “Spot Lock” feature. Spot lock, which makes use of i-Pilot’s internal GPS receiver, will maintain the trolling motor within a 5-foot circle of a GPS-identified position. If current, wind or waves moves the trolling motor out of that 5-foot circle, i-Pilot automatically adjusts prop speed and direction to return to the 5-foot circle. Once back in the circle, i-Pilot will adjust the motor speed to zero.

    Now, I could have picked a flat calm day to demonstrate the Spot Lock feature, but that wouldn’t have been fair. Rather, I ran these field tests under less-desirable, yet far more realistic conditions of overcast skies, drizzle, and 20-25 mph winds from the W/SW. This first photo (below) illustrates today’s environmental conditions. By the time I finished my work, these 1-2 foot waves had built to 2+, and the wind was gusting to 32 mph (as indicated by our National Weather Service office). Good conditions under which to test i-Pilot’s ability to hold a spot!

    jhalfen
    Posts: 4179
    #787015

    Before we go into the i-Pilot’s performance, let’s take a look at the i-Pilot remote and the portion that controls the Spot Lock feature. This portion of the remote is in the lower right hand corner, and is really just two buttons (highlighted in blue in the second photo, and shown in detail in the third): an anchor, which engages the Spot Lock feature, and a curly arrow, which allows the user to reengage Spot Lock for a particular, saved location. When Spot Lock is engaged, an anchor is displayed in the upper right hand corner of the i-Pilot remote display (4th picture). Three different positions can be saved by Spot Lock; these memory spot assigned to positions (A, B, and C) can be selected by the user when Spot Lock is first engaged. In the last photo, I have Spot Lock engaged (anchor), I am using memory location C (below the anchor), and i-Pilot is controlling the prop speed (prop symbol in middle; 3 1/2 is the prop speed setting, for a GPS speed of 0.9 mph). The final item on the remote display is the GPS signal strength (4 bars) in the upper left corner.


    jhalfen
    Posts: 4179
    #786387

    On to the test. Here’s what I did: I motored into the middle of 6000 acre Lake Wissota where I wouldn’t get any sort of break from the wind. I cleared the active trail from my Humminbird 997, and then idled while the wind set up a nice drift for several hundered feet. I wanted to see how fast the wind would puch me around in the absence of any input from i-Pilot. That drift (from SW to NE) is shown in the first screen capture from my Humminbird 997. After dropping a quick waypoint, I circled back towards my original position, and engaged Spot Lock, and waited. For almost 10 minutes, Spot Lock performed precisely as advertised in Wissota’s wind and waves. As I was pushed away from the saved position, Spot Lock controlled the prop speed and direction to bring me right back to within a small distance (impossible for me to measure) of the original location. The second screen capture shows the tight ball of trails present after nearly 10 minutes of Spot Lock doing its job (note the time on the left).

    jhalfen
    Posts: 4179
    #785467

    After 10 minutes, I was convinced about i-Pilot’s ability to hold a position. So, I turned the feature off, and drifted away from the saved location. That drift is shown in the third screen capture. After drifting for a few hundered feet, I reengaged Spot Lock by pressing the curly arrow button underneath the anchor button on the i-Pilot remote. I-Pilot knew just what to do and where to go. It dialed my prop speed up to 10, and ran directly back to the original, saved location where I had engaged Spot Lock in the first place. That run back is shown in the fourth screen capture. Note the scale on the left hand side of the Humminbird 997’s screen: I zoomed in much closer than I had in the first three screen captures, to demonstrate how closely packed the GPS trails are while Spot Lock is engaged. It looks like nearly all of those trails fit within a 20′ x 20′ box, or just about a boat-length. In my opinion, that represents excellent performance in the face of a nice chop and 20+ mph winds with much higher gusts. The last screen capture shows the entire test, from start to finish, including the portion of the test when I turned Spot Lock off and then turned it back on again.


    jhalfen
    Posts: 4179
    #546226

    Spot Lock is a fantastic boat control tool, and will definitely help you put more fish in the boat. Applications that come to mind immediately include casting cranks or jigs to wingdams on rivers, live bait rigging or slip bobber fishing over small, isolated humps or rockpiles, or even just simply holding your boat in a specific place while you fight, land, and release fish in typical walleye-fishing weather conditions: wind, waves, and current. Once my on-the-water test was over, the skies cleared a bit, which meant it was time to fish. I broke out a jig pole and decided to pitch a few minnows around a small rock hump that rises to 9 feet in 30+ feet of water, using i-Pilot’s Spot Lock to hold me in position against the wind and waves. This 3.5 lb smallmouth bass greeted me shortly thereafter. That’s the first fish I’ve caught with help from my i-Pilot, and I know it won’t be the last!

    crossin_eyes
    Lakeville, MN
    Posts: 1339
    #765146

    Awesome on-the-water report Jason. Thanks!

    cspierings
    Oregon, WI
    Posts: 113
    #547267

    Jason,

    Do you have to have an autopilot on your motor to upgrade to the ipilot? Based on your info above it seemed as though it may not be needed but then again I wonder if you don’t have an AP in your motor you might find yourself unable to install the ipilot ot perhaps have a more difficult time installing.

    jhalfen
    Posts: 4179
    #535820

    As far as I know, your motor does not need to have an autopilot to be able to install i-Pilot. As I mentioned in my install tutorial, if an autopilot is present, it gets removed as part of the i-Pilot install process.

    Just checked the i-Pilot manual. During the install process, it refers to the autopilot with the word, if. As in, “If the trolling motor has Autopilot, it must be removed as follows:”

    I interpret that as meaning that your current motor need not be autopilot-equipped to be able to upgrade to i-Pilot. Your motor does need to be compatible with i-Pilot, however: Terrova, PowerDrive V2, and Riptide ST or SP, from 2007 forward.

    JBaumgart
    Posts: 3
    #810048

    Hi, I’m a new member here and this is my first post. I just purchased a new Terrova 80 with AP (and US2) to replace an older MinnKota 55 bow mount. The Terrova has not been mounted yet as I am waiting for a HDS-5 to arrive (backordered). After reading this thread (incredibly helpful information thanks to Jason Halfen) I am thinking about returning the Terrova/AP/US2 and getting just the Terrova US2 version. Based on what I am reading here, if I plan to add the i-pilot then I would be just wasting $$ by getting the Terrova with AP. It seems that I might as well apply the savings toward the i-pilot and I would have a much more capable package.

    Does this make sense?

    Thanks, JRB.

    jhalfen
    Posts: 4179
    #810049

    That’s the right approach, if you plan to add an i-Pilot. Your Terrova’s autopilot is removed during i-Pilot installation, so it makes sense to get the less expensive, autopilot-free Terrova and apply that $$ towards the i-Pilot.

    Welcome to the best fishing site on the web, and thanks for the compliment!

    JBaumgart
    Posts: 3
    #810053

    Jason, thanks very much for your assistance – much appreciated.

    lineth
    Posts: 7
    #816070

    Thanks for all this information. If one activates ipilot can you still use copilot (which I have mounted on my rods and on a wristband) as well as the foot control ? Thanks

    jhalfen
    Posts: 4179
    #816076

    i-Pilot will completely override co-Pilot; co-Pilot and i-Pilot are not cross-compatible.

    The foot pedal retains full functionality with Terrova. With PowerDrive V2, the foot pedal is not functional with i-Pilot installed.

    lineth
    Posts: 7
    #816228

    Thanks for reply. I have a Riptide with Copilot and autopilot— so the Copilot will not retain the left-right or on- off functions? Going up to the bank to retrieve a crankbait etc is already a little difficult– it seems it would be worse while holding a remote control size device and a rod and reel. Do you wear the ipilot around your neck on lanyard? Thanks

    big_jon
    Posts: 37
    #829648

    While sitting in my boat about a year ago, the fishing was pretty slow and the wind was constantly changing not only direction, but changing speed. I wondered how long it would be until GPS technology was implemented into electric trolling motors….I wondered this out load to my fishing companion that day….he said I was nuts….
    I work in the agricultural industry where farmers are miles and miles ahead of the rest of the world with access to GPS applications to help them assist them in their world….I love the idea of “working a point” a guy should be able to drive a line, record this line and dial in the speed that you want this unit to walk your boat exactly back across this line….revolutionary, the technology that this would mean…..Many of the agricultural applications include an “auto steer” system which enables farmers to plant crops or till their fields with flawless perfection of accurate straight rows….I offered a name for my idea “Wato-Steer”…I still like the name and think I-Pilot is too pop culture for me….I’m betting the next generation of Lake Maps will allow an angler to take advantage of pre-existing A-B lines, and essentially eliminate the need to “pre-fish”, dump the boat in and fire up the I-pilot to take full advantage of pre-existing map information.
    To a certain degree, at the ripe old age of almost 40….I’m starting to get a little old and cynical in my ways and wonder if this isn’t somewhat like hunting gophers with an elephant gun, and essentially eliminating some of the sport that is involved in the sport….but the teenager in me, can’t wait to give one of these a try, and learn more about the system….Please keep this thread going, I’m anxious to learn more about these.

Viewing 30 posts - 1 through 30 (of 64 total)

You must be logged in to reply to this topic.