I Finished My European Mount

  • kentuckyboy
    Maple Grove, MN
    Posts: 270
    #203511

    This year I decided to do the research and figure out how to do European mounts for myself.

    I think it went fine for the first go round. It took a little longer than I thought. I did manage to brighten the bases of the main beams just a little though. If I’m more diligent about the water level I’m sure this won’t be an issue in the future.

    I still think this deer has such a cool looking rack. I will enjoy looking at this mount for years to come. Knowing that I did the mount myself makes it all the more special.


    big_g
    Isle, MN
    Posts: 21847
    #129876

    Looks good Talking about water level, did you boil it ? What was the process ?

    kooty
    Keymaster
    1 hour 15 mins to the Pond
    Posts: 18101
    #129877

    Looks great. I had my neighbor boil mine last fall. Someday I may take on the task of doing it myself. My buddy used a power washer to clean his out after boiling.

    Did you use a bleach kit? I did. Not sure it did much. I’m happy with the end result though.

    kentuckyboy
    Maple Grove, MN
    Posts: 270
    #129878

    My buddy has a stove in his garage that he let me use. I boiled it in a large round pot. More round and not as tall as the stainless ones used for frying turkeys. I put about a cup of Oxy Clean, Borax and A&H Super Washing Soda mixture as the pot was coming to a boil. It took a couple of 1 1/5 hour boil and clean repeat steps. I used a little pressured water to help out with the process. It was just a focused stream from a garden hose.

    The next day I used 40 volume peroxide from a beauty supply store to get it white. I used a large syringe to apply the peroxide. I got a cheap 3 pack used for administering oral medication to farm animals. It worked like a charm.

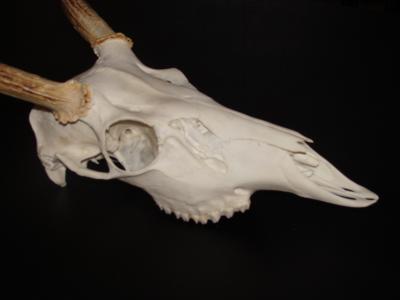
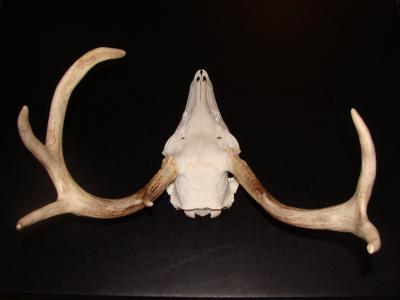
    My rookie mistake was not thoroughly cleaning the pot before I started boiling. I introduced contaminates (small black flakes) onto the skull and gave it an overall grey color from my first boil. I did a second boil at home with the same whitening mix as before but my water level was a couple of inches over the skull this time. It removed some of the chocolate color from the bases as a result of the second boil. After that the skull looked a lot more like I had expected. The second round of 40 volume peroxide made it white as snow.

    super_do
    St Michael, MN
    Posts: 1069
    #129883

    KentuckyBoy,

    Looks great! If you want to, you can take some wood stain and touch up the antlers where they got a little lighter in color. I’ve done this in the past.

    jeff_jensen
    cassville ,wis
    Posts: 3053
    #129884

    When applying the peroxide, stuff eye and nasal cavities and any smaller holes with cotton balls. Wrap entire skull with paper towels and generously pour on the peroxide. Re-soak a time or two, 24 hrs later you have a snow white trophy

    kentuckyboy
    Maple Grove, MN
    Posts: 270
    #129885

    I didn’t have to use much of the 40 volume (4 times the strength of drug store grade) peroxide at all using the syringe method. Whatever ran off the skull into my shallow plastic tub I just sucked back up and reused during that treatment. I also put the leftovers that were used in a separate bottle and reused it the following day to finish whitening. Don’t put used peroxide back into the unused bottle. This will lower the strength very quickly.

Viewing 9 posts - 1 through 9 (of 9 total)

You must be logged in to reply to this topic.