One of the most frequent questions I get over the years is ” How do you catch so much when you barely have any time to set traps?”
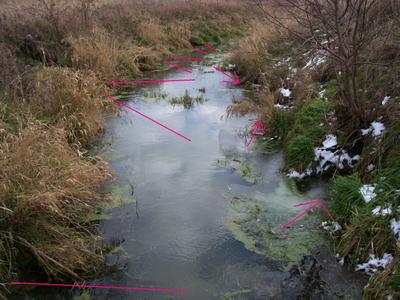
Work smart and find ways to stack the odds in your favor- fast! I trap a lot of drainage ditches and ponds in the area. I’m into catching and I don’t have time to mess around. Its a numbers game. I have a limitted amount of time, to make as many sets as I can, with a given number of critters hitting a isolated watering hole.
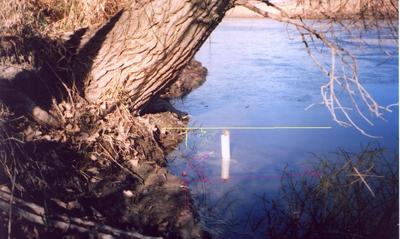
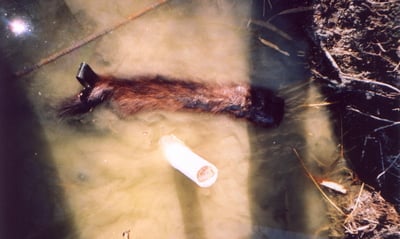
Drown rods enable me to make very quick sets, carry a minimal amount of equipment, and have very reliable drowning sets.
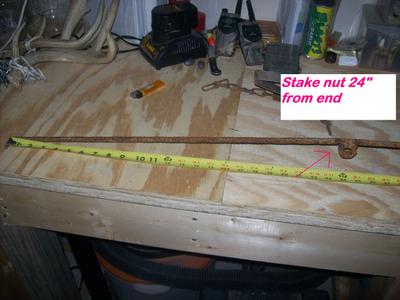
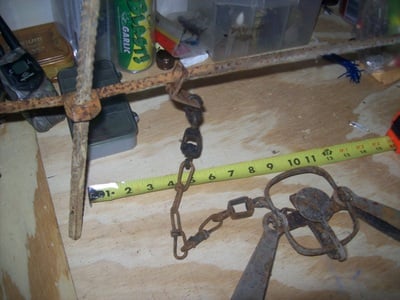
General set up is very simple. Along a tall bank or obstruction, run 24″ of rod into the bank, drive a 1/2″ by 18″ stake through the stake nut, (make a pocket set, PVC pipe, or scented stick) set trap, bed it solid, and move on. I gage my time by setting about 20+ quality sets per hour including travel time. I was never able to acheive this with typical aircraft cable drown wire and weights.
The 3/8″ rod is plenty stiff for mink, rats and coon. For beaver and otter, you need to beef these up some. But the end of the rod hanging over 2′ of water is plenty to effectively drown your target animal.
Below is step-by-step how I make them with pics of a well worn in drown rod. If you need any clarifications, shoot me a PM
Constructing Drown Rods
Material List
• 10’ 3/8” rebar
• Min. 1-1/4” x 1-1/4” angle iron
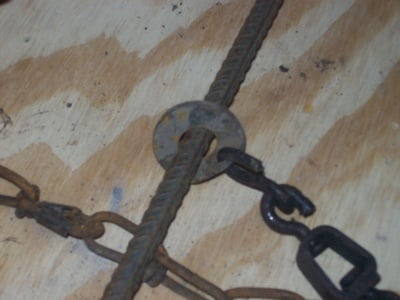
• OR 7/8” Fender washers
• ½” nuts (lock stop)
• 1” nut (stake nut)
• Drill 7/32” or up to ¼”
• Drill 5/8”
• Chop saw or metal band saw
• Welder
• Dremel tool or file
Locks
1. Cut angle iron at 1-1/4” wide (chop saw)
2. De-bur edges and round off corners
3. Drill 5/8” hole one “tab”
4. Drill 7/32” hole on other tab.
5. De-bur holes
6. OR Bend fender washer over to 90 degrees at edge of inner hole.
7. On “tab” of washer, drill a 7/32” hole
8. De-bur and required edges.
Rods
1. At 24” from one end of the rod, clamp flat side of 1” stake nut to rod. Weld all contact edges of nut to rod. Critical to have a solid weld without burning through the rod.
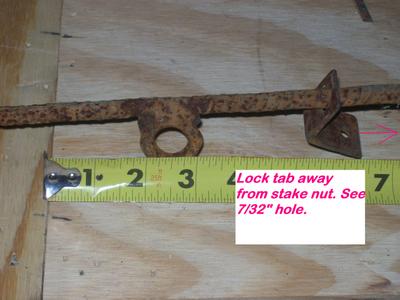
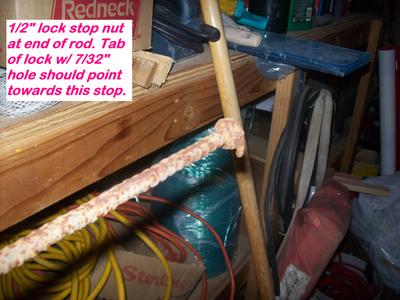
2. Slide lock onto rod with tab (w/ 7/32” hole) pointing towards end of rod (opposite end of stake nut)
3. TEST LOCK!!!!! LOCK MUST BE ABLE TO SLIDE FREELY AWAY FROM STAKE NUT. Must lock and not slide up the rod towards the stake nut with any off-center resistance.
4. Tap ½” lock stop nut onto end of rod. Weld to hold.