Trail Cam Mount – Make your own adjustable trail cam mount.

  • TheFamousGrouse
    Participant
    St. Paul, MN
    Posts: 10956
    #1641416

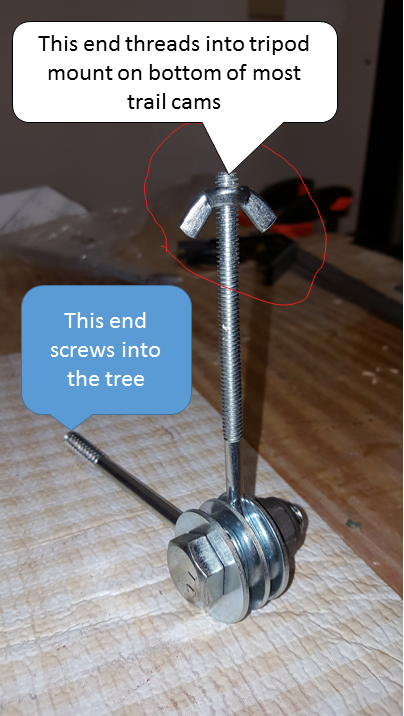
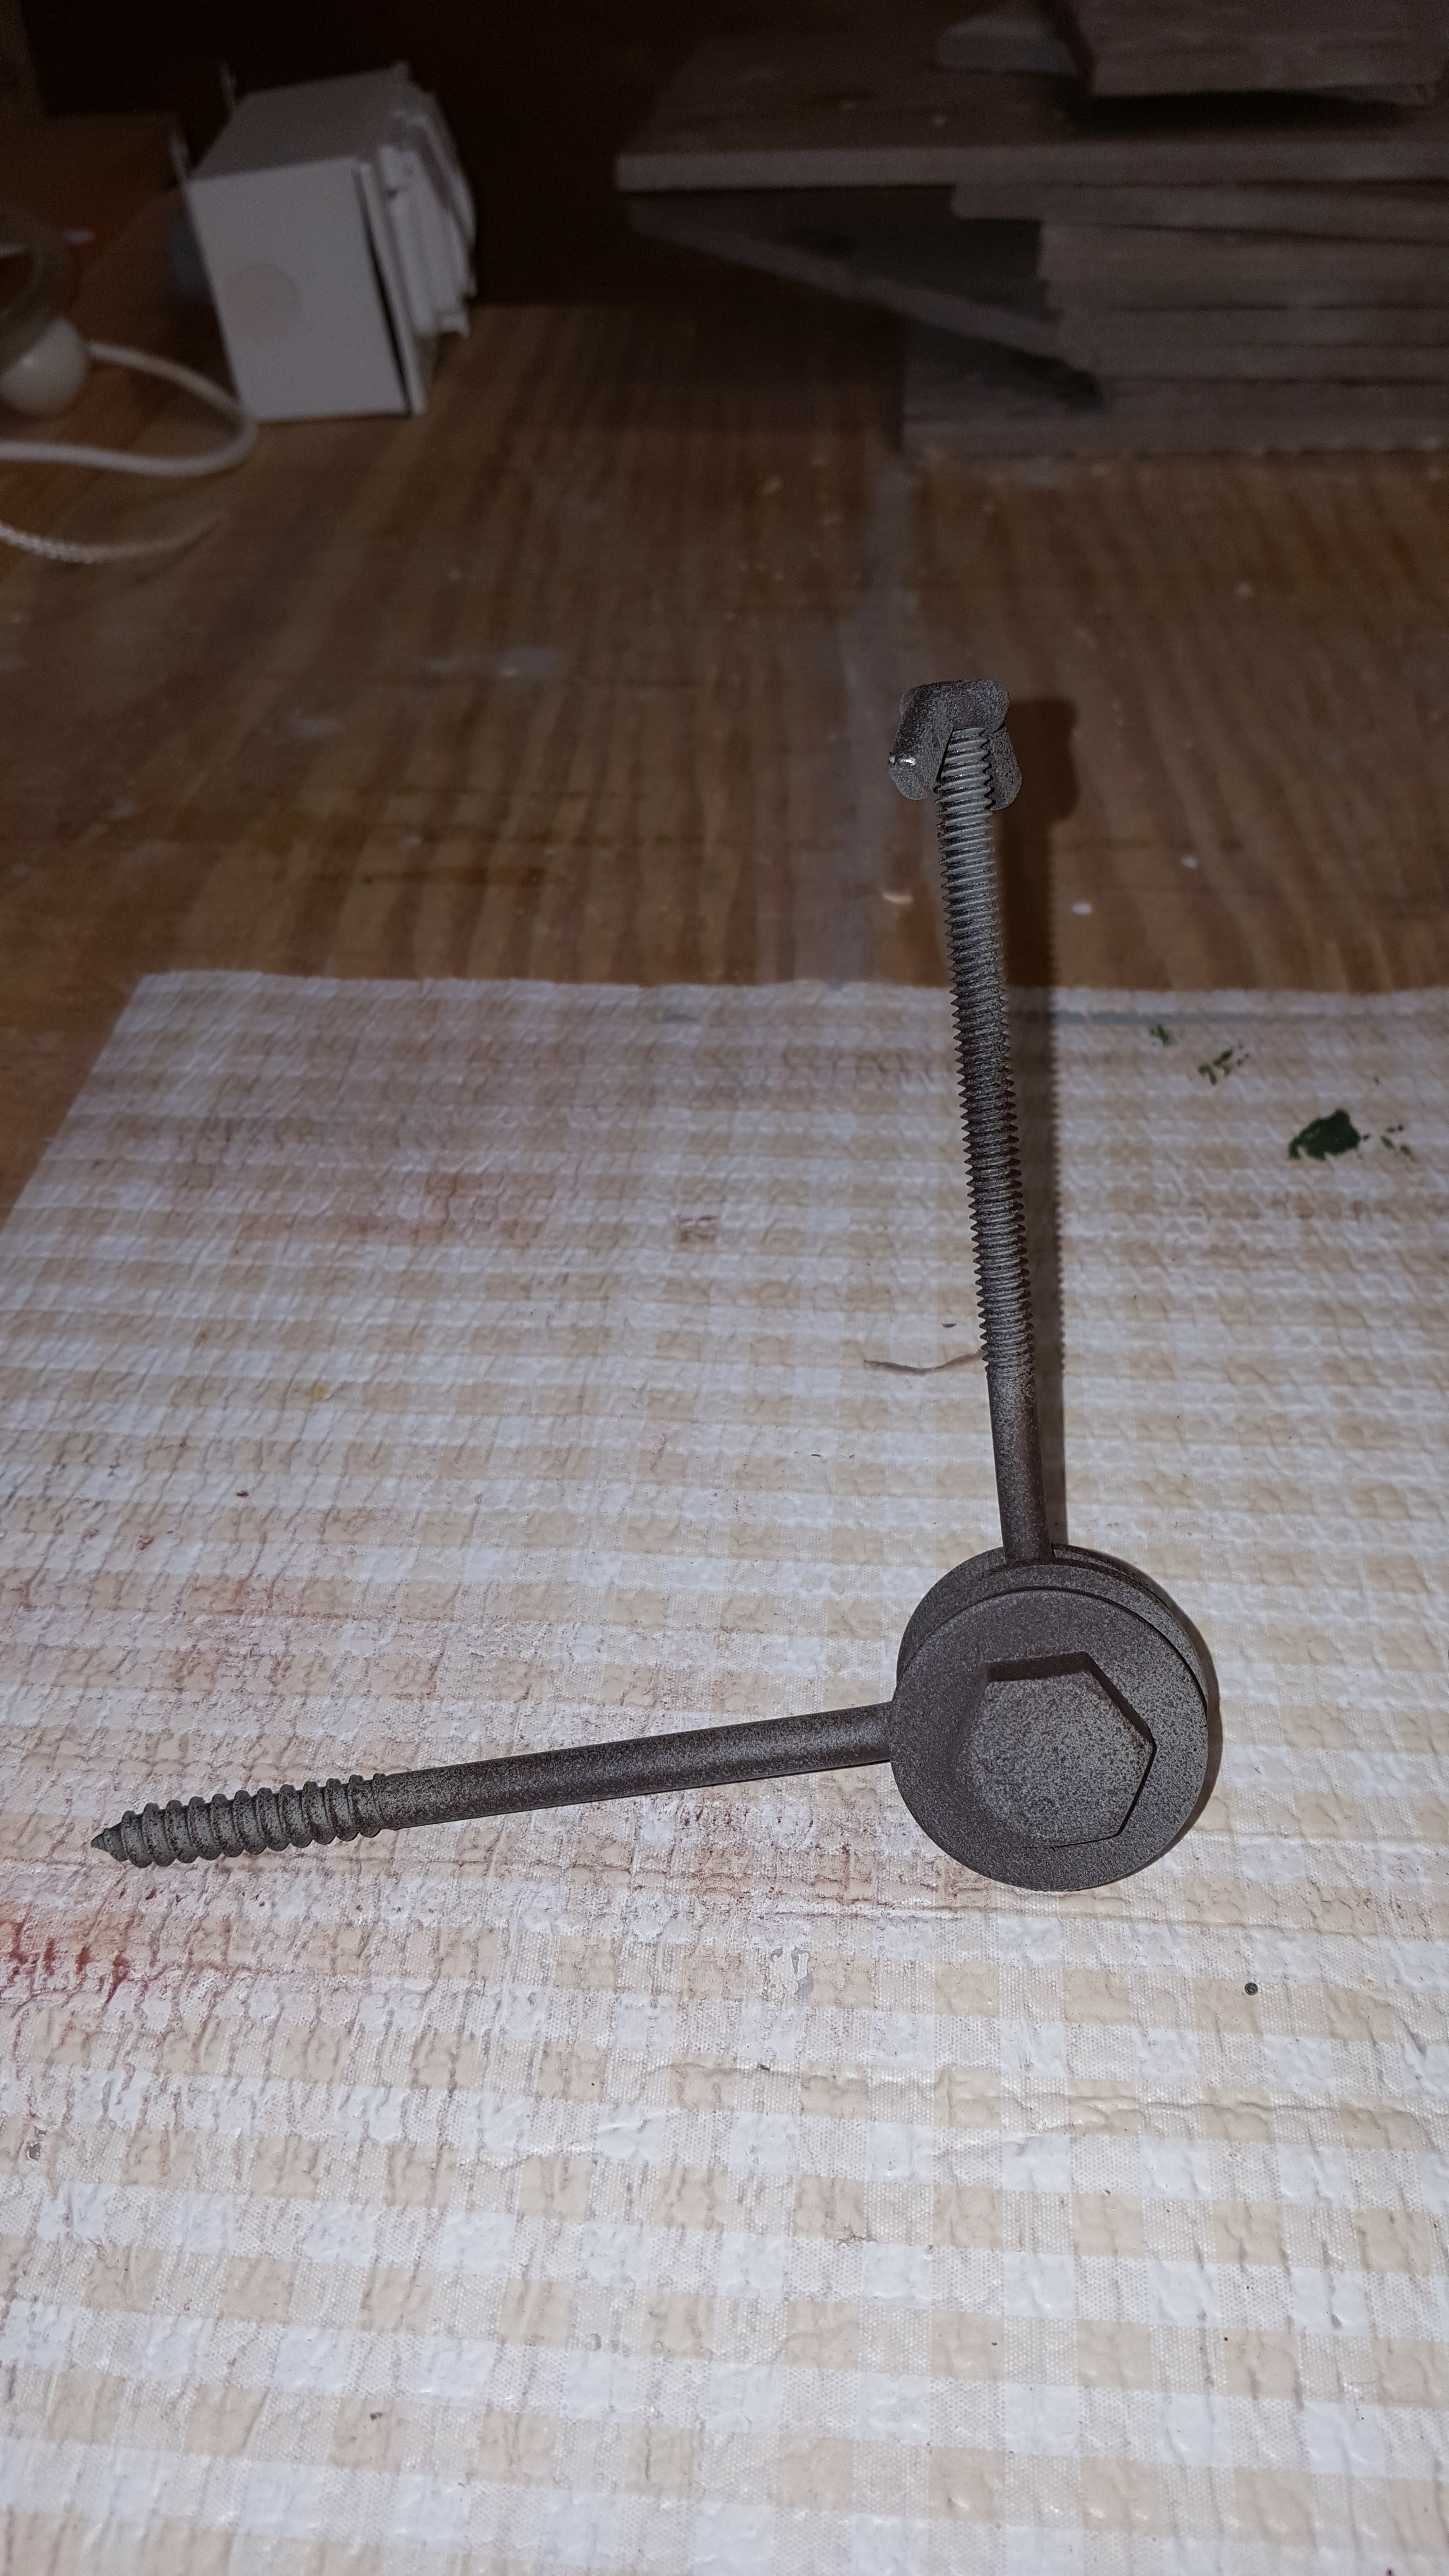
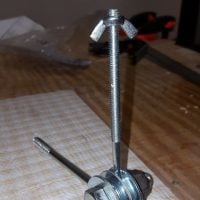
    I wanted to share an easy-to-make, adjustable trail cam mount that you can build in your own shop for just a few dollars per mount. This mount uses a threaded eye bolt, so they can be screwed into a tree without the use of other tools.

    Using straps to mount trail cams is a fools errand in my view. You can never get the camera pointed just right without jamming sticks under the cam and the whole process wastes time. This mount allows you to quickly mount a camera on any tree or branch and then to adjust it to the perfect angle.

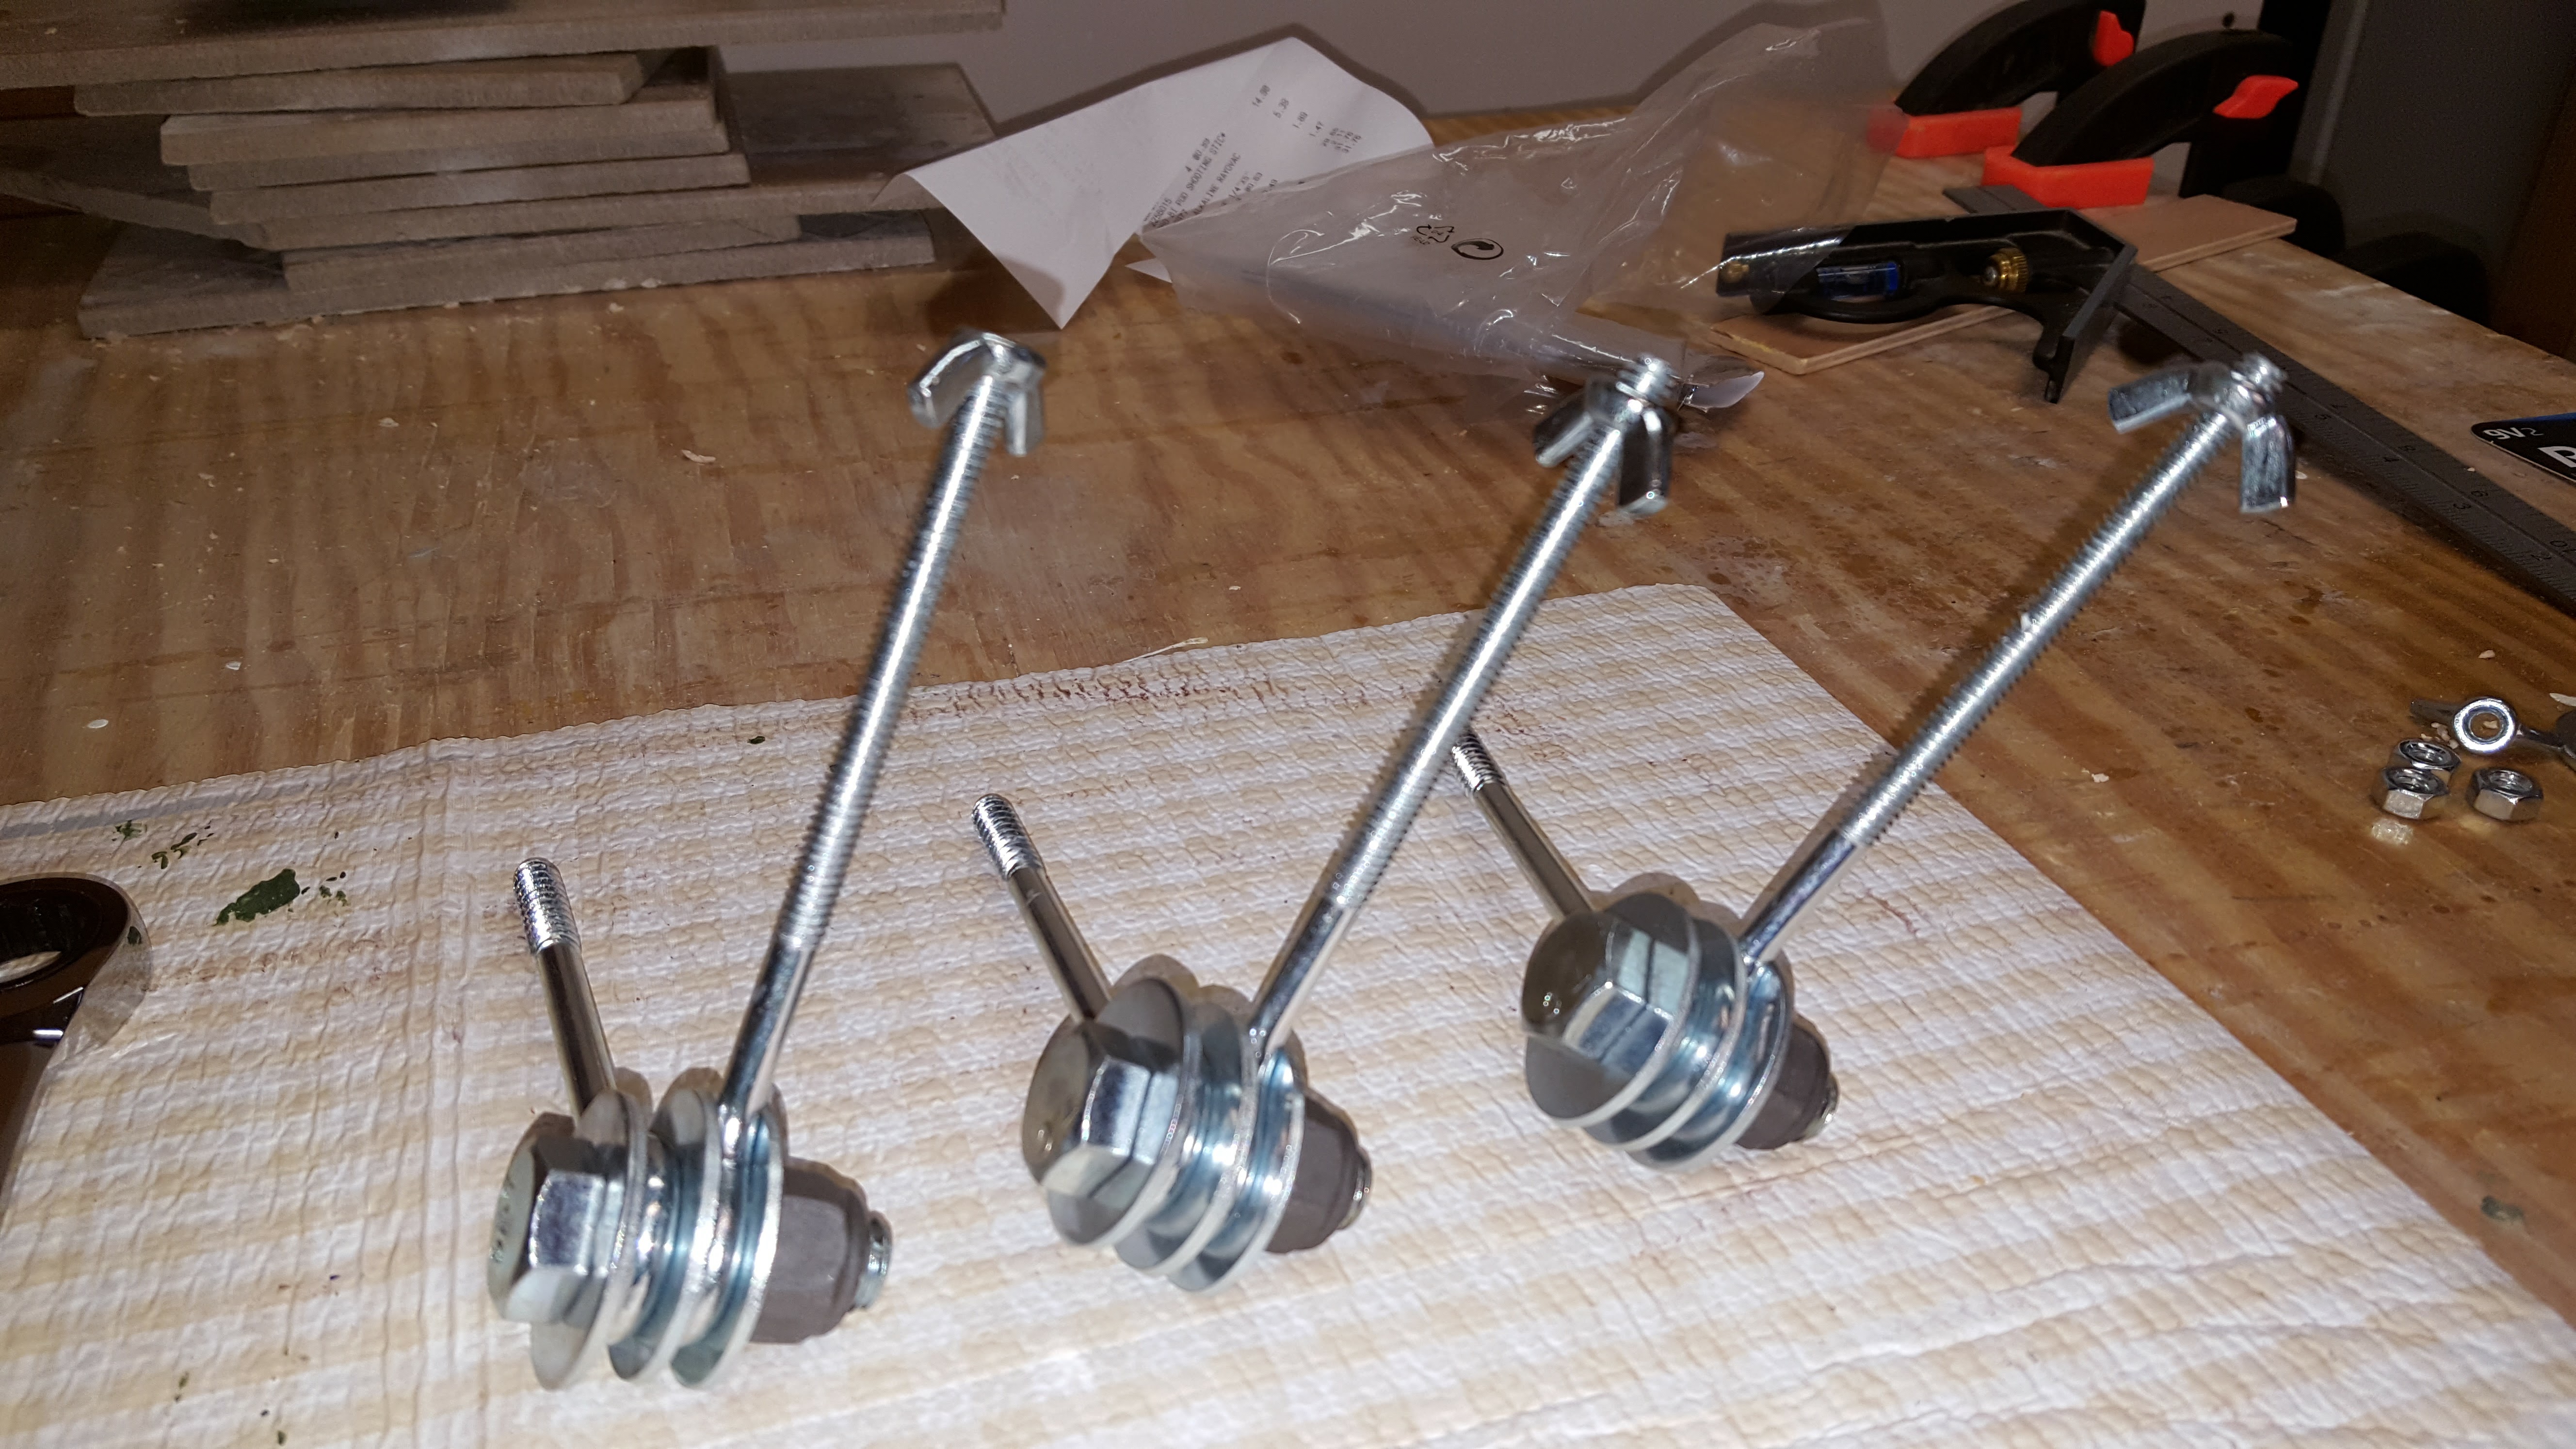
    I’ve been making these mounts for a couple of years now and they really work well. They are easy to install on a tree, steady, and they allow you to easily aim the camera in multiple directions. For the price of few dollars for a bag full of hardware store parts, it’s easy to make enough of these for a whole fleet of trail cams.

    This mount threads into the standard 1/4 threaded shoe mount that is present on most trail cams.
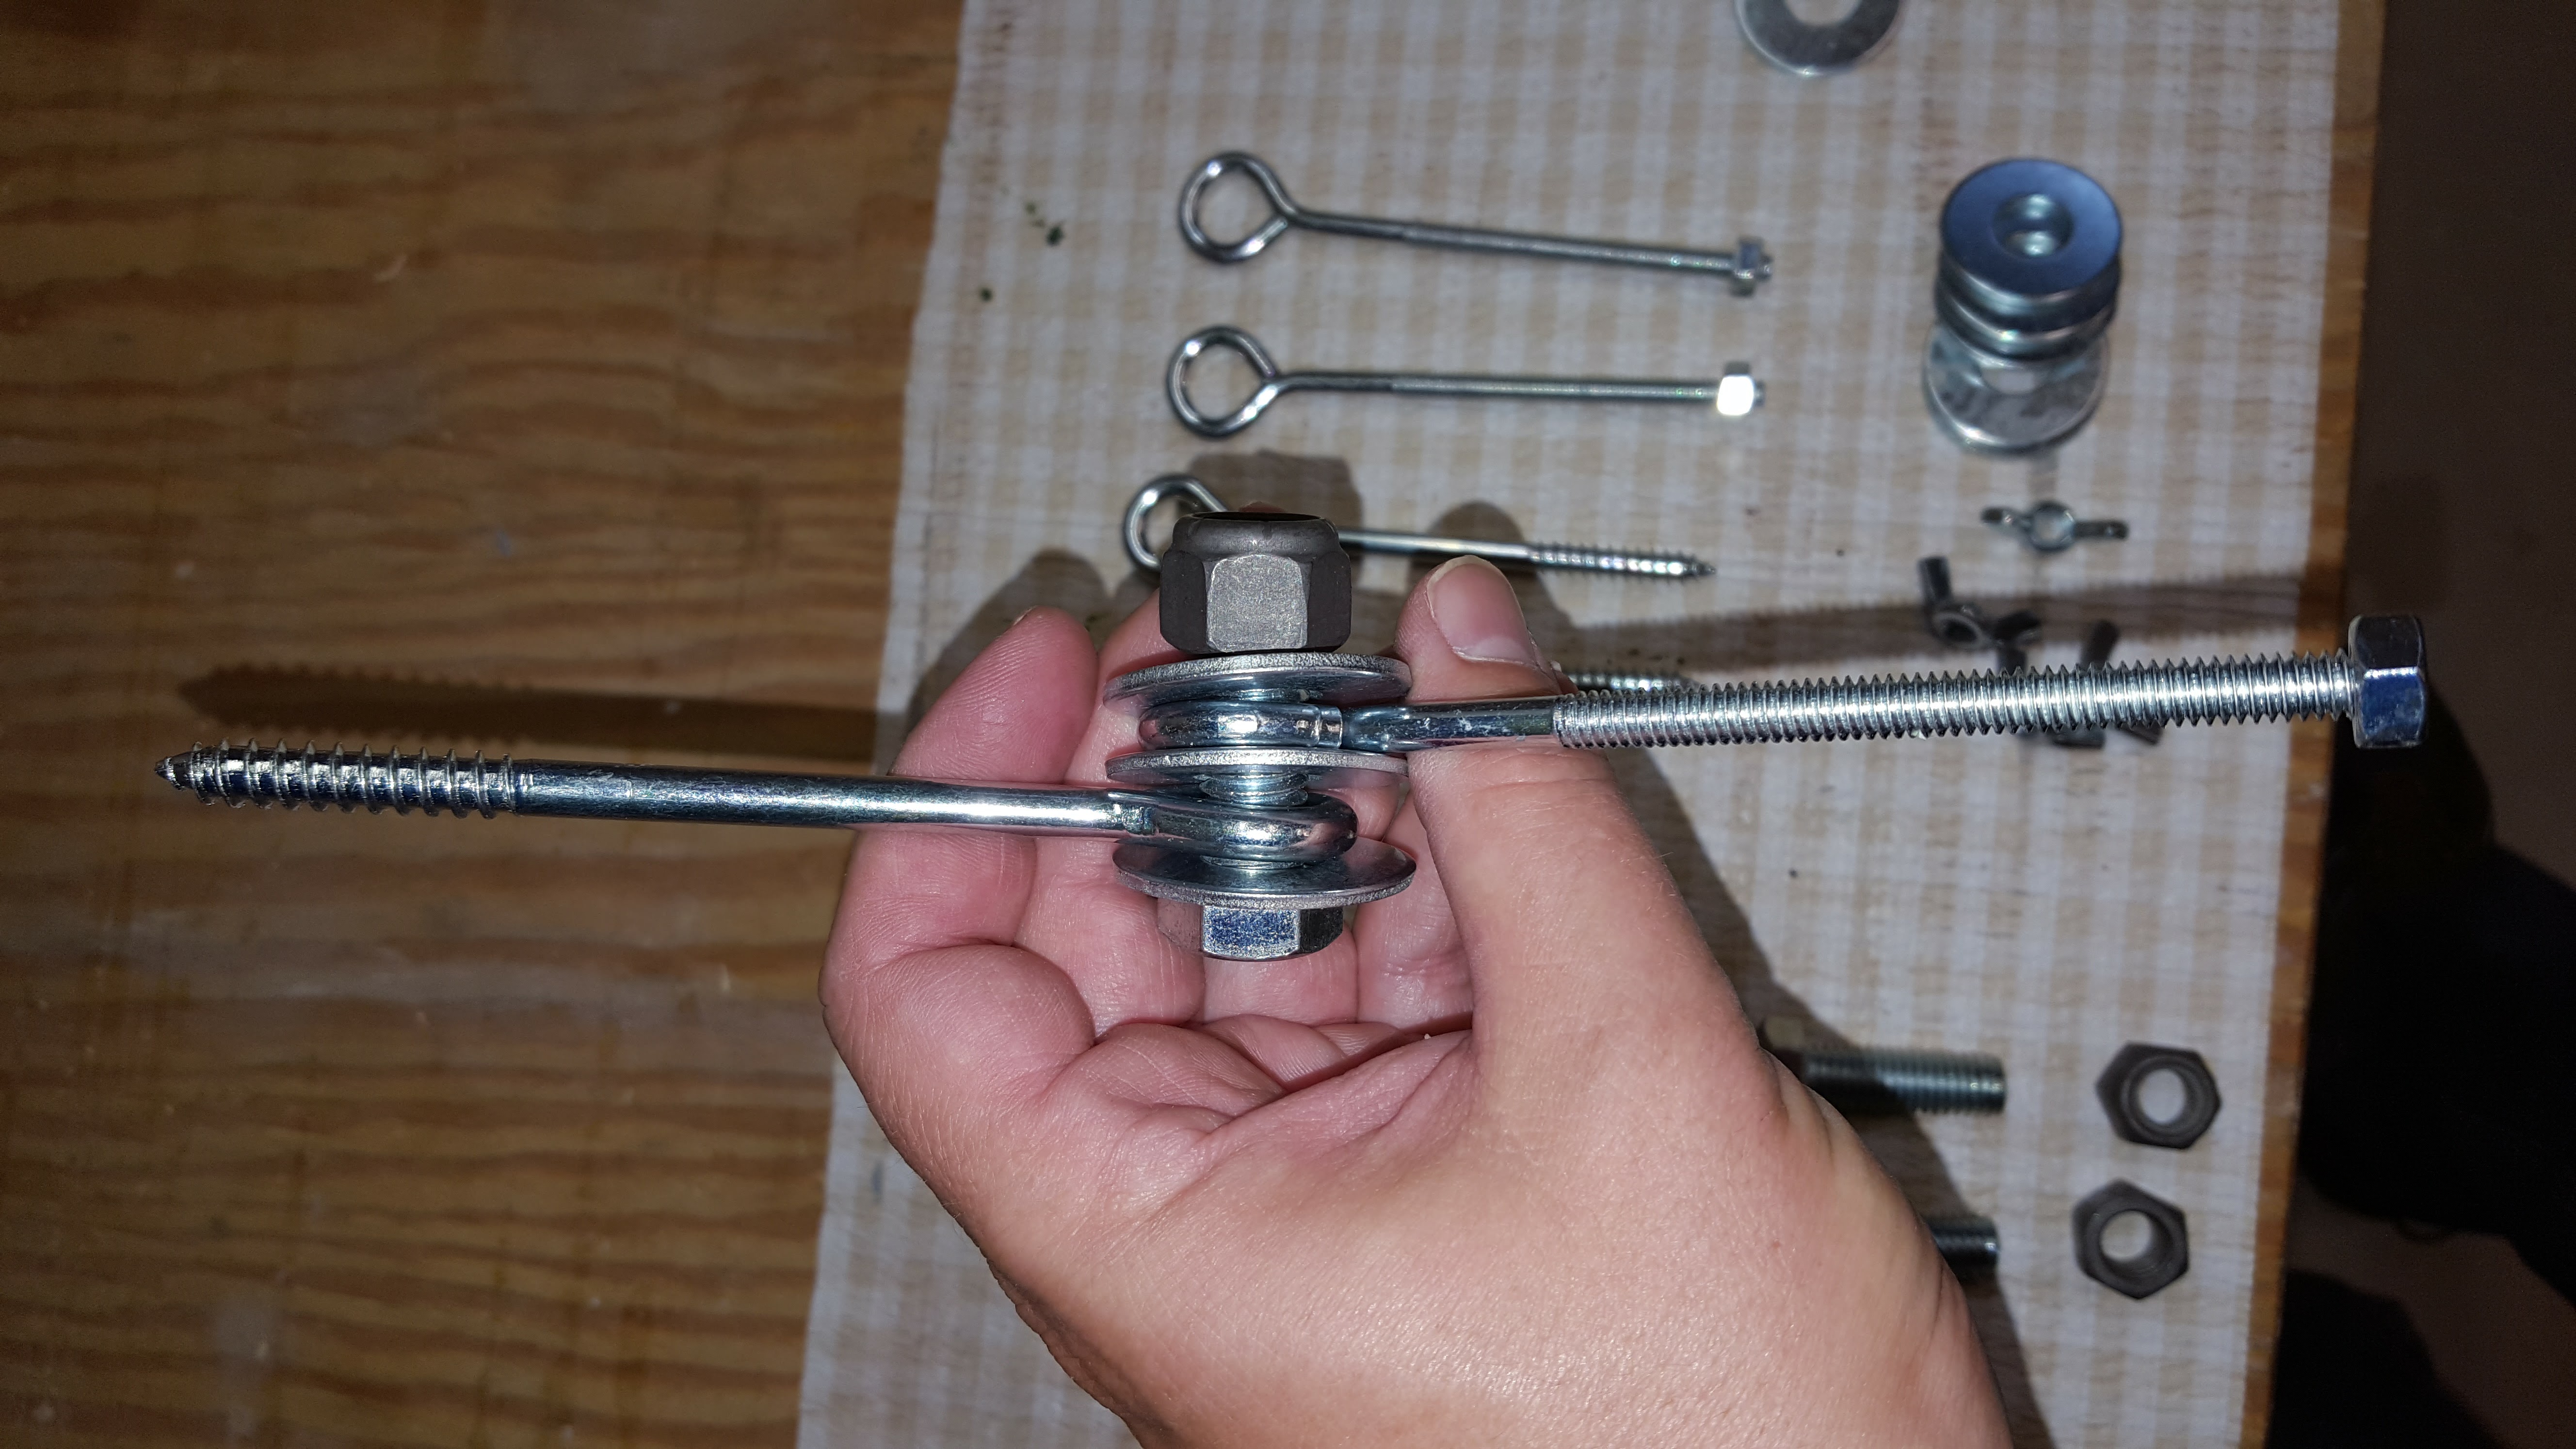
    Parts list:

    To make one cam mount, you need:

    5 inch x 1/4 inch eye screw
    5 inch x 1/4 inch eye bolt
    1 1/2 inch x 1/2 inch bolt
    3 flat washers to fit above 1/2 inch bolt
    1/2 inch nylon lock nut
    1/4 inch wing nut

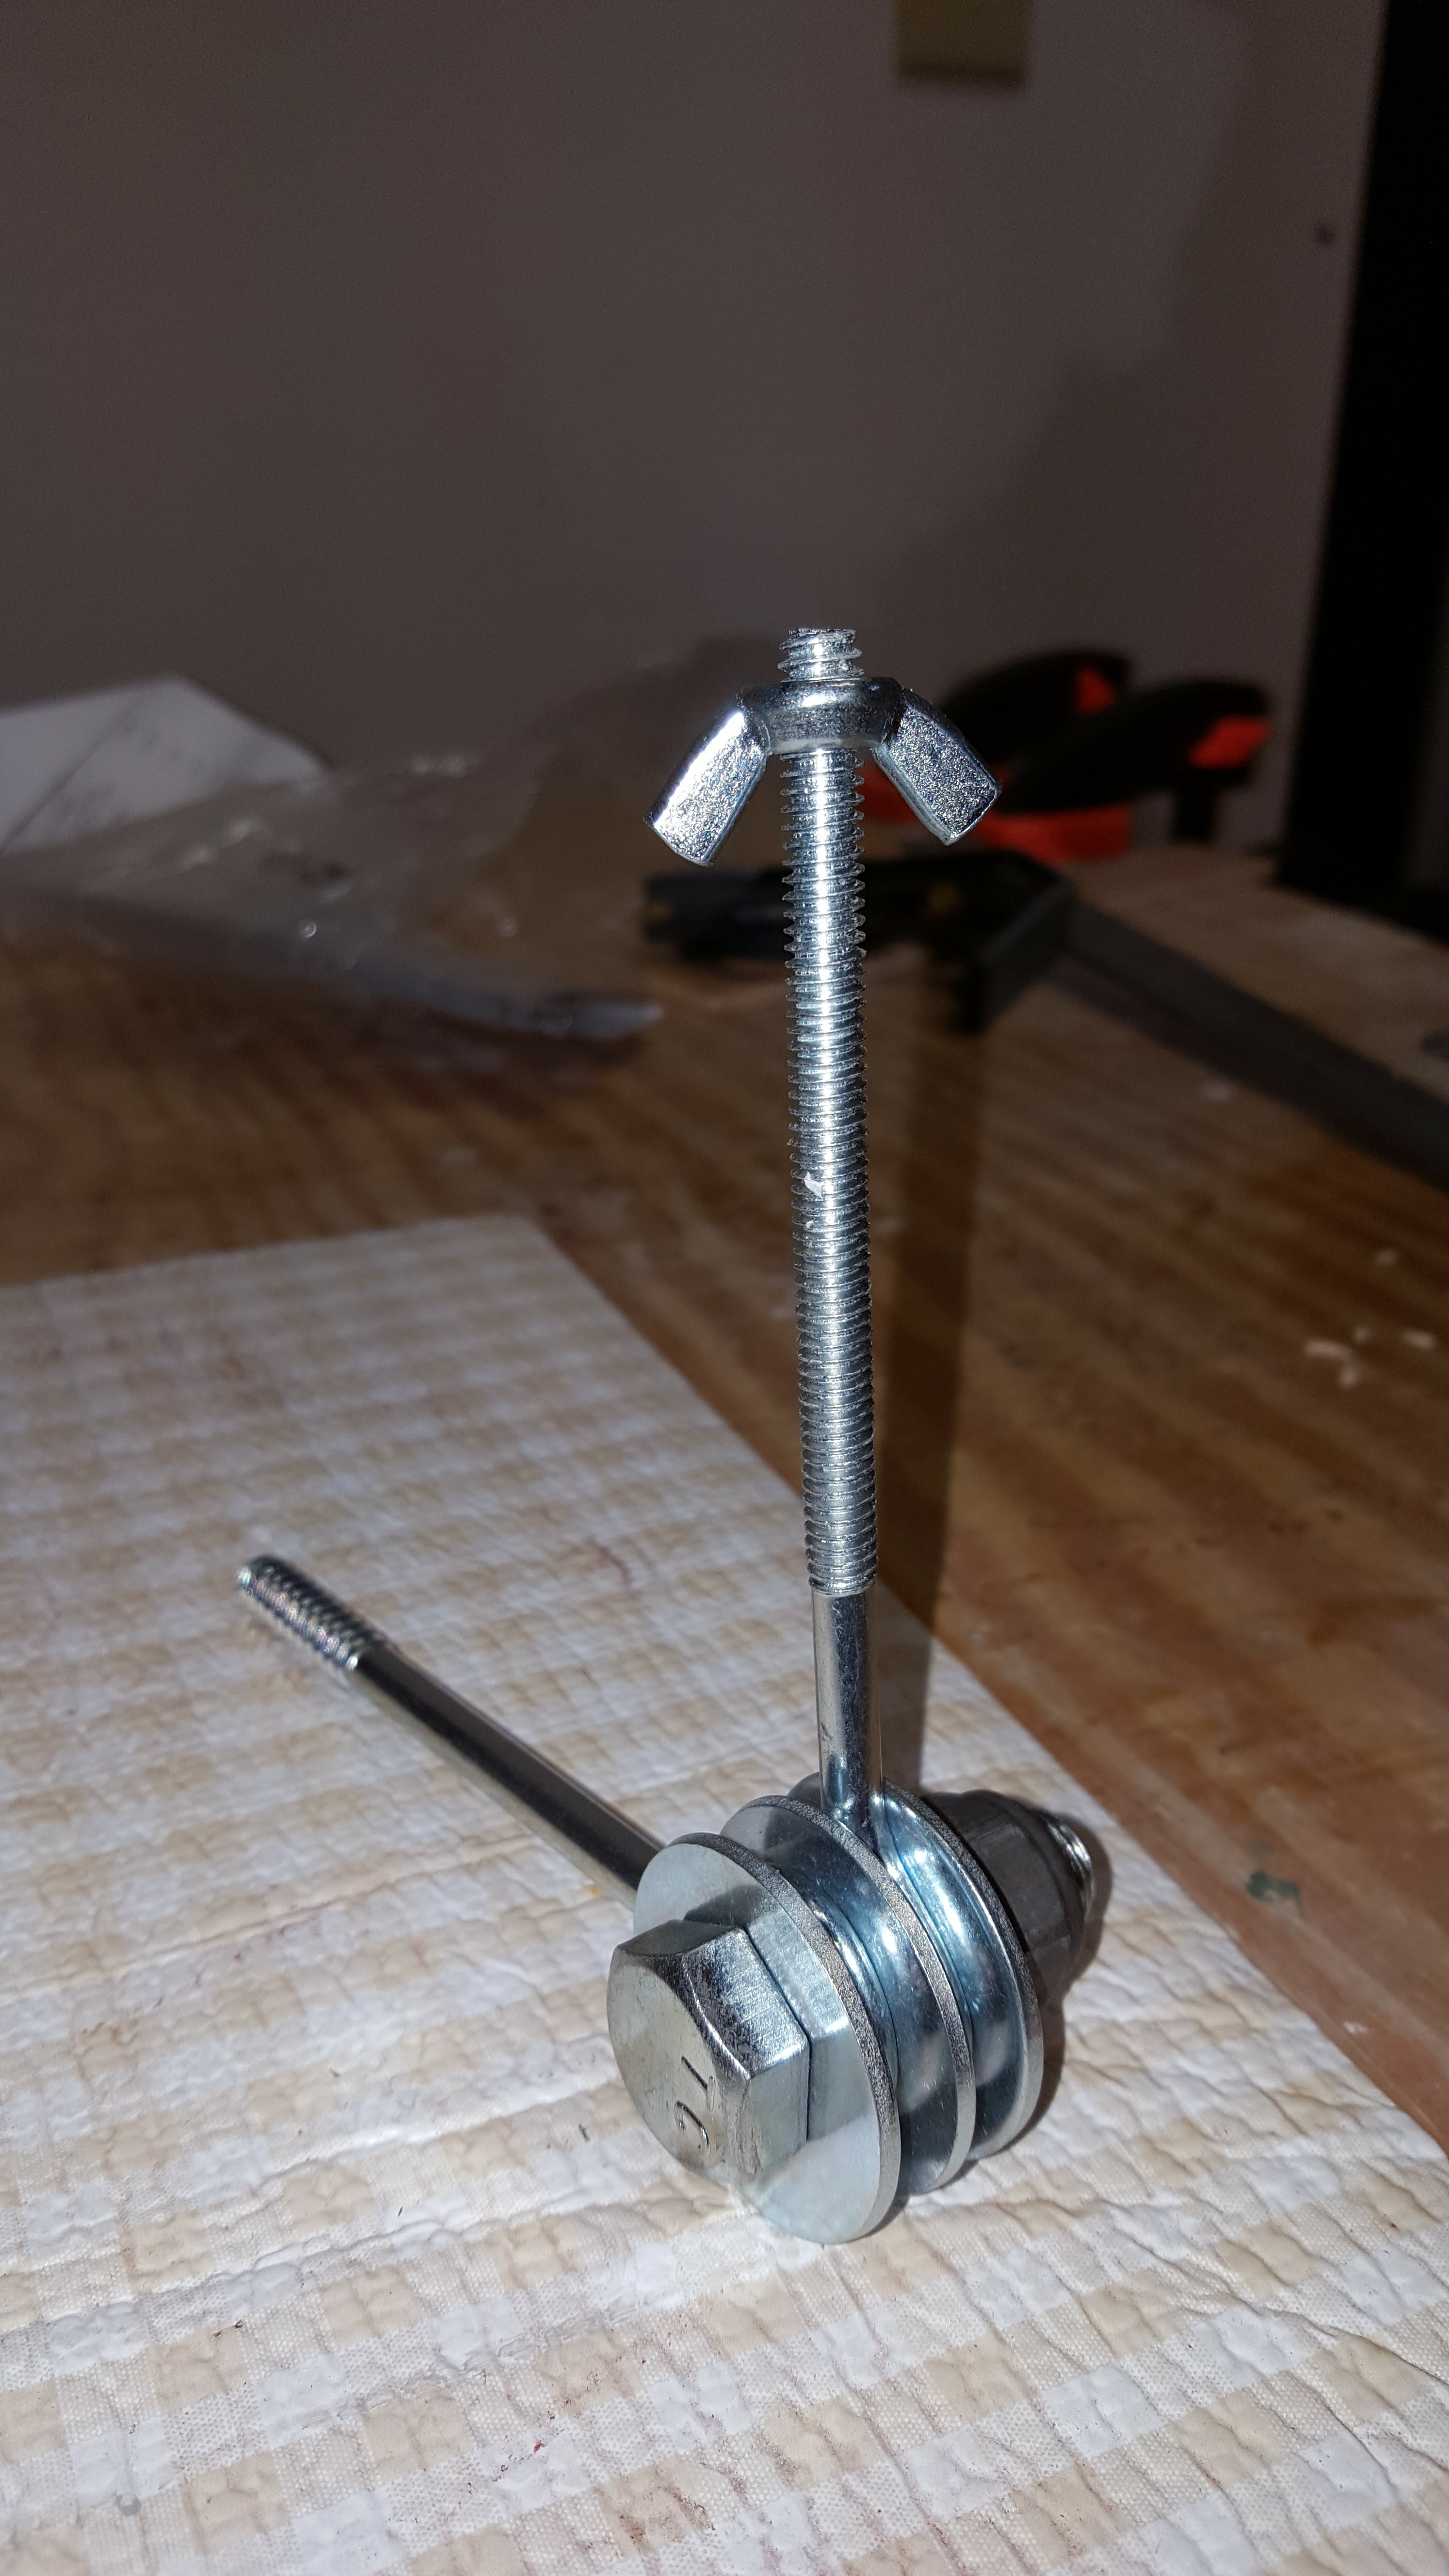
    Here’s a picture of the finished product before paint, just to give you an idea of the end result. I always give mine just a quick blast of dull camo paint so they blend in and don’t give away the camera with a glint of light off of the shiny steel.

    Step-by-step to follow.

    Attachments:
    1. 20160924_164025.jpg

    TheFamousGrouse
    Participant
    St. Paul, MN
    Posts: 10956
    #1641419

    Step 1: Start by placing one of the washers on the 1 1/2 inch x 1/2 inch bolt and then padding it through the eye on the 5 inch x 1/4 inch eye bolt. It’s the eye bolt that will be screwed into the tree.

    Step 2: Next place another washer on the bolt.

    Step 3: Place the 5 inch x 1/4 inch eye bolt on the bolt, and follow that with another washer.

    Step 4: Now put the nut on and finger-tighten.

    You should now have an assembly that looks like the photo.

    Attachments:
    1. 20160924_163739.jpg

    TheFamousGrouse
    Participant
    St. Paul, MN
    Posts: 10956
    #1641422

    Step 5: Use 2 3/4 inch wrenches to tighten the assembly. Tighten only enough so the two eye bolt shafts can be moved by hand without too much effort. It takes some testing to get this tension right.

    Step 6: Thread a wing nut on the top of the eye bolt in place of the standard hex nut (see photo). The wing nut is used to tighten against the bottom of the camera to lock the pan adjustment in place.

    Done! Well, almost. If desired, go out and give them a blast of flat matte spray paint to remove the silver shine. I made 3 of them in about 10 minutes today.

    Attachments:
    1. 20160924_164348.jpg

    2. 20160924_164025-1.jpg

    TheFamousGrouse
    Participant
    St. Paul, MN
    Posts: 10956
    #1641425

    I’ll post a picture of the finished camo version as soon as they’re dry.

    To use the camera mount:

    Find a suitable location for your camera. Thread the screw eye bolt into the tree. Then, simply mount the camera on top of the other arm of the mount and adjust both the pan and the tilt.

    Tighten the wing nut against the bottom of the camera when you are satisfied with your adjustments.

    Hope this is helpful. I’ve made about 10 of these mounts. I love the ease of mounting and adjustment and it beats paying much more for a commercial mount.

    Grouse

    John Luebker
    Participant
    Posts: 690
    #1641705

    I am interested but just failing to see how they hold the camera. (my wife says I have no vision :-)) so if you could post one of the camera mounted i would love to see that as well?

    Thanks
    John

    Huntindave
    Participant
    Shell Rock Iowa
    Posts: 2947
    #1641707

    I am interested but just failing to see how they hold the camera. (my wife says I have no vision :-)) so if you could post one of the camera mounted i would love to see that as well?

    Thanks
    John

    The camera will have a 1/4×20 threaded insert. Screws right to the eyebolt and the wing nut locks the camera in position.

    Huntindave
    Participant
    Shell Rock Iowa
    Posts: 2947
    #1641708

    Using straps to mount trail cams is a fools errand in my view.

    Unless the DNR or the landowners don’t allow screw in mounts. One can adapt your screw in mount by simply adding a block of wood. Screw the mount to the block and strap the block to the tree.

    TheFamousGrouse
    Participant
    St. Paul, MN
    Posts: 10956
    #1641712

    All my cams are deployed and are on duty, so I’ll have to describe this as best I can.

    The end of the mount that’s circled in the attached picture that has the wing nut on it will thread into the 1/4 inch tripod mount that is on the bottom of most trail cams.

    The other end with the sharp point and the screw will thread into the tree. The cam mount should be threaded into the tree first, then place the camera on top.

    Once the camera is threaded onto the mount and aimed correctly, use the wing nut to tighten against the bottom of the camera to hold it steady.

    This camera mount allows you to adjust the camera for both tilt and left/right “pan”. The joint where the two eyebolts connect allows you to adjust the camera for tilt. That’s why it’s important not to over-tighten the nut that holds the assembly together.

    To adjust the left/right “pan” direction the cam faces, untighten the wing nut, adjust the cam, and tighten the wing nut again.

    Hope this helps. Will grab a picture of one of my cams on a mount as soon as I can.

    Grouse

    Attachments:
    1. Trail-Cam-Mount.png

    TheFamousGrouse
    Participant
    St. Paul, MN
    Posts: 10956
    #1641721

    Unless the DNR or the landowners don’t allow screw in mounts. One can adapt your screw in mount by simply adding a block of wood. Screw the mount to the block and strap the block to the tree.

    Yes, you could certainly use it that way. I have also given these mounts to friends and one guy screwed a cam mount into the top of a piece of 2×4 that is about 5 feet long. This setup allowed him to “weave” the 2×4 between the 3-4 strands on a barbed wire fence so that he could position a cam anywhere along a fenceline.

    I have a variation of this mount that threads into a steel electric fence post. I can easily pound the eFence post in with a hammer and then attach the cam mount and this allows me to position the cam where there are no trees or other convenient places to mount it.

    Grouse

    John Luebker
    Participant
    Posts: 690
    #1641857

    Thank you for the description. I didn’t know they had that mount I will take a look at mine to see if this works for me!

    John Luebker
    Participant
    Posts: 690
    #1642290

    worked great I made 6 of them for about 2.50 a piece – thanks for the tip!

    TheFamousGrouse
    Participant
    St. Paul, MN
    Posts: 10956
    #1642333

    Good deal, Lubie. Glad they work, I wanted to share the design as I think they’re a great improvement for not much money.

    Here’s my version after camo paint job.

    Grouse

    Attachments:
    1. 20160924_194139.jpg

    Ralph Wiggum
    Participant
    Maple Grove, MN
    Posts: 11696
    #1792080

    Bringing this one back to the top since a bunch of us have new trail cams on the way. I slapped one of these mounts together last night. Thanks, Grouse!

    klang
    Participant
    Posts: 172
    #1792081

    Thanks for the idea! Great and cheap to build. One question, if you replaced the nut with a wingnut do you think you could get the bolt tight enough by hand, to hold the camera from tipping? I never seem to bring the right wrench in the field with me. Thanks again for the idea.

    Ralph Wiggum
    Participant
    Maple Grove, MN
    Posts: 11696
    #1792084

    One question, if you replaced the nut with a wingnut do you think you could get the bolt tight enough by hand, to hold the camera from tipping?

    I wanted to do that, but Fleet Farm didn’t have a 1/2″ wing nut to fit (well, they did, but it was stainless steel, and I didn’t want to pay $5.75 for one friggin’ wing nut).

    TheFamousGrouse
    Participant
    St. Paul, MN
    Posts: 10956
    #1792222

    Reread instructions starting with step 5.

    By using a nylon lock nut the assembly can be tightened just enough so it supports the cam in the intended position, but still is easy to adjust.

    The washers and the locknut allow movement but still hold the cam steady.

    Grouse

Viewing 16 posts - 1 through 16 (of 16 total)

You must be logged in to reply to this topic.