Hopefully some of it makes it to Pool 4 this week cause we need some water bad!
IDO » Forums » Hunting Forums » Deer Hunting » How do I take better pictures
How do I take better pictures
-
October 13, 2008 at 4:00 pm #716918
Send it down here. Would love to see the river come up about a foot.
October 13, 2008 at 5:45 pm #716942Quote:
Send it down here. Would love to see the river come up about a foot.
The river is “PROJECTED” to come up a foot by this sat. the last I saw
 October 13, 2008 at 5:50 pm #716945
You must of looked at a different site than me Eric. THe one I looked at had it staying pretty flat. Was a little surprised at this since around Aitkin its up over a foot and a half. Hope you are right. High water in the fall equals lots of hungry river walleyes.
October 13, 2008 at 10:25 pm #717005Not sure what site I was looking at in the bait shop, but that is what I thought I saw
 I guess im wrong
  November 22, 2012 at 3:16 am #203444
Whats the secret to taking good pictures in the field? I have posted a couple pictures of bucks me and my son have taken but they never do justice to the true size of the animal (same with fish).
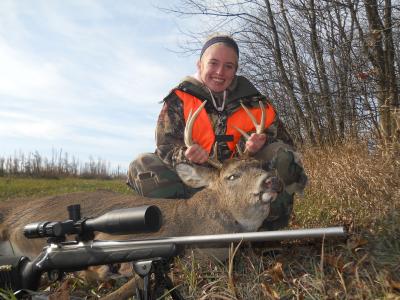
I see fantastic pictures of others trophies on here so I know its possible. Any suggestions are greatly appreciated.November 22, 2012 at 3:53 am #127249I am just learning myself and had a buddy who is a little more experienced with it explain some of his thoughts. First you want to be facing towards the sun, but not looking directly at it. This will eliminate most shadows and will cast a lot of light onto the deer. Position the deer such that you show off not only his rack, but also his body as this will add a lot to the picture. Also, make sure to select a background that will allow his rack to stand out. Clean all of the blood off of him that you can as this will lead to very presentable pictures. Rub a little water or spit onto his eyes as this will make your pictures seem a more lifelike (I forgot this in my pictures of my bow kill this year and I am a little disappointed about it).
When you have all this done, you are ready to get yourself in position for the picture. Set yourself up so you are in a good comfortable position and that you can move the deer and yourself into multiple poses. When holding the rack, try to show of as little of your hands as possible as this will keep the focus on the rack. Have the cameraman(woman) shoot pictures almost level with the deer or at a slight angle down towards the deer. This will help show off all of the buck’s attributes and won’t cause the dreaded “shortening of the tine effect” that is so prevalent in shots that are taken from too high above the deer. Finally, take a lot of pics, from several angles and you will soon be able to see what you like best and what works best to show off the deer. The beauty of digital cameras is that you can take tons of pics in a short amount of time and learn instantly what works best.
Good luck….although it doesn’t seem like you need any more luck this season!
 November 22, 2012 at 3:54 am #127250
Oh and I forgot, get close. I thought my shots were all close but, in hindsight, I wish I would have taken them closer.
November 22, 2012 at 1:34 pm #127264thanks for the tips. I hope to try them out this weekend if my son connects.
November 22, 2012 at 5:45 pm #127272Yes i can post again somehow!
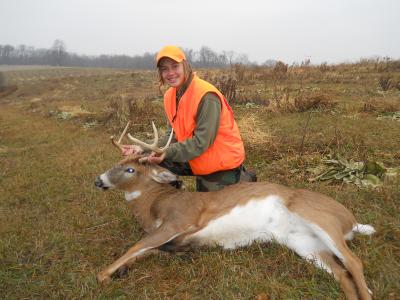
Number one is you want to find a background thats has good contrast to the antlers.
Second you gonna wanna clean up the blood if possible, if your no in a place where you can wash it youd be amazed what some dirt can do, a hand full of dry dirt on the wound and his face, rub it in then brush it off, works great!
Third your gonna wanna position him so his front legs are folded back4th you want to get back a bit from the deer especialy the bigger guys, a barrel chested/bellied guy holding a 160 with 2 hands right infront of him will look like a 130.
5th unless he has baems you cant get your hand around dont hold him by the rack, slide your hand up under his chin,keeping your hands out of site will help enlarge the appearance of the rack.
6 GET LOW standing over the top of a guy to take the pic doesn’t help anything, all of the best harvest photos i have taken have been from on my belly.
7 take atleast 30 pics maybe 60! How often are you taking pictures of a big buck? Take your time enjoy it! When your lookin back on the pic for yoears you dont wanna be thinkin man i coulda done better, you wanna think wow was it worth it to take 100 pics, typicaly i like 2 or 3 of them!
8 MOVE! 30 pics from the same spot does nothing for finding the perfect pic, change angles, move around no more the 5 to 10 pics in the same spot!
9 for gods sake smile, when im sitting at home watching my boy NOT hunting and i see a pic of a guy holding an huge buck and hes not smileing all i can think is IMO what a grouch, this aint a im a bad [censored] shot its a fricken harvest photo! And lastly make sure you post the dam things so we can see! Thats what were here for!November 24, 2012 at 1:11 am #127295This is a great question and some good responses. The first step is to get a deer down…still working on that part myself
 . Ben has some great points and I will be looking this post up hopefully sooner than later. One aspect I pay attention to when taking a picture is the entire frame. Not every picture should be dead centered and only showing the hunter and deer. Anytime we take a deer there is guaranteed beautiful scenery somewhere close, we just need to find it.November 25, 2012 at 4:31 pm #127336
Just some random adders –
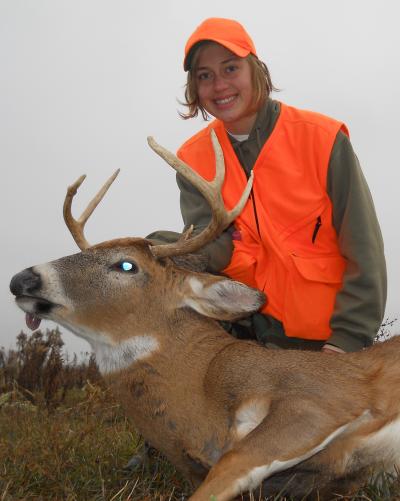
Fill the frame. A lot of people put the subject matter in the center and leave way too much head room.Camera angle – shoot at a level that is equal to or LOWER than the subject. This gives it a “larger than life” perspective. Shooting downward will give a perception of smaller size.
Fill Flash – Hard to do with point/shoot digital cameras, but the fill flash shout be 1 to 3 f-stops brighter than the back ground lighting. This is why it is critical to shoot many different shots. The auto censers will pick up different reflective spots and can change the exposure without you doing anything different. Also having the “highlights” from the flash will bring direct attention to the core of the subject matter.
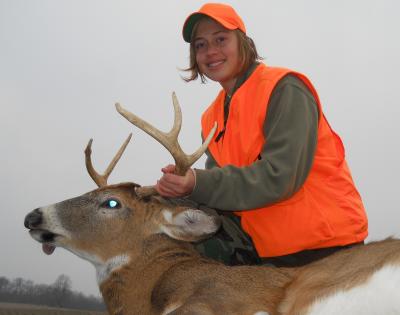
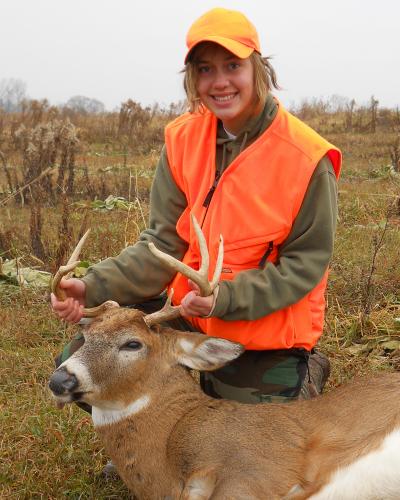
Also use your composition to hide unwanted things. Olivia’s first buck was a lop-sided thing. The different angles provide a different perception based on what your brain fills into the picture.
Look at the composition. Try to avoid having a “line” divide the subject matter. Often its hard with the horizon of the landscape. This is where shooting a few different angles of perspective will give a better composed shot.
As mentioned – digital cameras allow you to shoot an unrestricted amount. Take advantage of that and shoot, and shoot, and shoot….
In college, the best class I ever took was advanced composition. Had to take a minimal of 1000 shots of a single item. I did a lighthouse, and learned more in 24 hours about photography than all my other classes combined. The first 100 went easy, then struggled on 101-500…then the next 3000 shots went super easy. Having that vision of how you want it to look and not being caught up in the moment will have you seeing what your looking at.
Anyways, a few random shots from a Nikon point/shoot I carry showng the good, bad, wrong and ooopppps!

 November 26, 2012 at 4:58 pm #127372
Can I say “fill flash” one more time… Most of the good pictures I see, could have been great with that single item…
Mark
November 27, 2012 at 3:37 pm #127420There is a lot of great info here. We have some guys who have a real talent for taking photos. I think the #1 one is to simply take the time and do it right. I never do. I’m trying to be better about this.
November 28, 2012 at 11:23 am #127455Get the photo where they were shot or close to it anyway. Never the garage or back of the truck.
Put the tongue back in the mouth.
Never ride the deer no matter how big it is.These are some ideas to make a great photo more tastefull.
There already have been some great composition ideas given.
November 29, 2012 at 6:37 pm #127545Thanks for the post. My pics always suck too and the answers have been informative.

Viewing 17 posts - 1 through 17 (of 17 total)
You must be logged in to reply to this topic.