HDS Install On A Fisherman 1700

  • TMF89
    Posts: 324
    #1307464

    Hey guys. So I have an 2002 Lund Fisherman 1700 that I just ordered an HDS-8 w/Structure Scan for, but I have no idea how to install it. I’ve never done any wiring work on the boat before, or tried to get access to any hard to reach areas. Does anyone have any experience working with my model boat, and any advice for me? Thanks guys!

    mojogunter
    Posts: 3152
    #1152470

    Lunds are pretty easy to work on at least the pro V’s are. Plenty of room to run the wires. I’m sure I or others on this site can talk you through it.

    TMF89
    Posts: 324
    #1152476

    Good to hear! Thanks.

    ironheadr5
    Northeast, Iowa
    Posts: 373
    #1152488

    Shouldn`t be a problem there directions are pretty good. Just chine in here if you have trouble.

    JohnWF
    La Crosse, WI
    Posts: 30
    #1152567

    I have an 02 17′ Fisherman on which, over the last 10 years, I have installed LMS/LCX/HDS units (bow & console), LSS-1, Elite-5 DSI, NEMA network and marine radio. I suggest that you consider running dedicated Pos & Neg 12 ga marine wires from a fuse at the battery to a new fuse block, to be located in a convenient area near your console, and have all your electronics powered with that circuit. It may seem like overkill for your present need, but needs change.

    If you have a NEMA network and have a separate antenna in addition to the internal antenna in the HDS-8 you will need to have a switch. Some people power the Structure Scan with the HDS while others have it switched separately. You could have the fuse block controlled with a master switch. The lower left toggle switch on your panel is probaly not being used. Makes for a clean installation. There is more than one way to power your stuff, so you have choices to make.

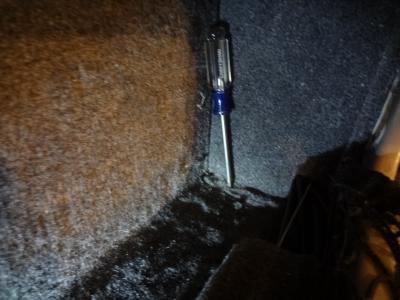
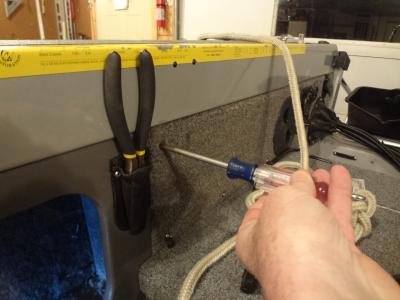
    Wire can be fished through the back of the battery compartment to the bilge, through one of the two ribbed hoses that lead from the bilge to the starboard side, through the storage area to the console where it gets a bit more challenging cause of sharp bends. An extra set of hands is helpful. It helps to remove the aft panel in the storage area- only 1 screw & 2 nuts/bolts hold it in place. Attach a string to your wire and leave the string in place for when you need to fish a new transducer cable, etc. through the same area. Secure your wires so things don’t catch on them.

    I started with a 6 fuse block under the console and a few years later changed it out for a 10 fuse holder cause of all the stuff I keep adding. Your needs will likely be different.

    If it’s any consolation, there is no comfortable position when working in a boat. You may draw blood.

    Enjoy.

    John

    TMF89
    Posts: 324
    #1152688

    Thanks for the info that’s very helpful! I already looked at my fuse box in front of the console and it didn’t have an open fuse or an unmarked one, but I’m guessing some of those “accessories” are just not being used? I’ll have to test it when I put the batteries back in. Are the screw/nut fasteners those rubber grommet looking things that line the paneling? I felt around in there and it seems like they might be.

    Also what do you run NEMA for? The second sonar in the bow? I thought you could run that through the Structure Scan box? I was told our motors (mine’s a 115 Yamie) are too old to actually hook up to the HDS units.

    JohnWF
    La Crosse, WI
    Posts: 30
    #1152853

    Separating the electronics from the rest of the boat is not absolutely necessary, but it may reduce some interference issues and makes for easy additions later. If someone told me in 2004 how much stuff I would put in my boat over a few years I would have told them they were nuts. You probably do have some unused fuses in the Lund fuse panel. The fuse panel can easily be removed for visual inspection.

    The screw/nut fasteners are stainless steel and they hold the carpet covered aluminum panel at the back(stern)side of the storage area. The pictures show the location of the one screw in the storage area and one of the two screw/nut fasteners. If you lift your jump seat you will see the second screw/nut location. (I replaced my jump seats with a platform matching the pre-2002 deck.) If you have skinny arms you may be able to get your arm through the inspection port to the push the wire into the storage area. Removing the panel just makes it easier. You won’t do this if you choose not to run the 12 Ga. wire

    I started my activites before the advent of the Lowrance ethernet connections and had an LMS 332c, an LCX 25c,a LG-2000 GPS antenna, a LMF-200 Gauge and a Lowrance Fuel Flow Sensor. All of these communicated over the NMEA network (aka Lowrance backbone). The NMEA network still handles the fuel flow sensor, LMF-200 Gauge, remote antenna (now LG-4000) and some functions of the current HDS units which are now on the boat. My two HDS (1 at bow, 1 at console) units are connected to the Structure Scan via the ethernet connections and also to the NMEA network. Data is shared via both systems but neither system conveys all the data. The HDS-7 at the bow is connected to the US2 on the Terrova and that unit can display trolling motor sonar, stern sonar or structure scan. Unfortunately, I really don’t remember if the sonar info is shared over the NMEA or the ethernet. Others will likely chime in on this issue. When at the bow, the info that comes from the back of the boat is not worth much unless you are backing up. It’s old news if you are moving forward.

    I didn’t tackle the issue of trying to interface my 2002 115 Merc Four Stroke with the NMEA Network. Can’t remember if it could have been done! Anyway, the Fuel Flow Sensor provided all the info I really wanted, primarily fuel consumption and relative calculations.

    The more you get into this the more questions you may have.
    Fire away. Good Luck.

    John

    TMF89
    Posts: 324
    #1153864

    Well after messing around under the console I found some information out. The old sonar has three cables coming from it, one accessory cable that’s not in use, the sonar and the power cable. The power cable’s negative end terminates into the fuse box (I almost think it’s just a ground because it doesn’t look like it’s going into anything), and the positive end attaches to a wiring harness that then goes back into the fuse box. The wiring harness has four wires, and only one of them is in use, spliced to the red power cable from the sonar. It looks like all the wires on the other end are plugged into the fuse box however. Can I just connect to one of these wires? Should I cut the current in-use wire and replace the old sonar’s positive cable with the new HDS, and run the negative end to where the old negative wire terminated? I know you recommended running a whole separate circuit for my depth finder, but I honestly can’t see how I’ll upgrade any more than this, and my comfort level isn’t very high with all this stuff, so I’d like to keep it as simple as possible. Also I looked at the lower-most console switch, and you’re right I don’t think it’s in use. It looks like three wires go into it, a black and two oranges, and one of the orange wires just ends in an unused connector. Could I just connect the yellow LSS wire to that?

    Oh, and here’s this gif as a thank you for your help. Because actually THROWING things is just for newbies right?

    TMF89
    Posts: 324
    #1154550

    I got the fuse box figured out I think. As for running the cables, I was able to get the transducer cable into the main storage compartment, but how do I go about running it up to underneath the console? Can the panel the throttle is on be removed? It looks like there are just nuts holding it on, but I’m not sure. How did you do it? Thanks again for all your help!

Viewing 9 posts - 1 through 9 (of 9 total)

You must be logged in to reply to this topic.