I’m looking for the metal custom arm for my lx6 if anybody knows where I can get one let me know thanks
IDO » Forums » Fishing Forums » Ice Fishing Forum » metal arms for marcum flasher
metal arms for marcum flasher
-
January 12, 2014 at 5:40 pm #1379222
Is he on this site I sent him a message an how much does he charges
January 12, 2014 at 6:02 pm #1379227I think it’s right around $30, but don’t quote me on that!
He’s on here, but you can also find him on almost every fishing site.
January 14, 2014 at 8:08 am #137968530 for marcums, 35 for vex/hbirds since they include a rubber stopper and delrin riser, however i might be out of rubber stoppers….
 January 14, 2014 at 9:09 am #1379712
Quote:
30 for marcums, 35 for vex/hbirds since they include a rubber stopper and delrin riser, however i might be out of rubber stoppers….
HAve you ever made one to fit onto a Showdown? I hate the arm on mine.
January 14, 2014 at 10:03 am #1379749Quote:
Quote:
30 for marcums, 35 for vex/hbirds since they include a rubber stopper and delrin riser, however i might be out of rubber stoppers….
HAve you ever made one to fit onto a Showdown? I hate the arm on mine.
no, i haven’t. they use a flanged end on their square arm, one that i haven’t had in person to take measurements off of. trust me tho, its common between showdown users, they would love to have something more sturdy as theirs keeps breaking if they are not gentle with it.
depending on the base tho, one could use the marcum arms and mount a riser to lift it from the base, like the vex and hbird users do…..
January 14, 2014 at 7:15 pm #1379875Thanks. I’ll have to play with it over the summer and maybe drop you a line.
January 16, 2014 at 9:01 am #1380211I have one on my Marum and it’s great, longer reach and indestructible, plus it looks great!!!
January 16, 2014 at 1:24 pm #1380311I broke my plastic arm on my showdown. Just search “metal arm for Marcum showdown transducer” and you will see a contact. If nothing else send me a PM and I’ll send you his e-mail address. I ordered one and it’s very nice.
Thanks
September 4, 2014 at 9:07 am #1451348Are you still making these? Getting going thru my stuff and finishing up my projects to get ready.
September 4, 2014 at 9:31 am #1451354Shane,
I’d like to order two of them .. one for my LX5 and one for the LX6
Can you put ICE FORCE on the arm for me ?
I’ll PM you for the $$ part of the conversation ..
September 9, 2014 at 12:39 pm #1452979right now, its up in the air if i will still be making them. the guy I had doing my polishing got transferred to another department, so I have been looking into powder coating processes and other painted processes. If I decide to go on with this, I will keep you all updated.
Thanks
Shane
September 9, 2014 at 1:13 pm #1452999right now, its up in the air if i will still be making them. the guy I had doing my polishing got transferred to another department, so I have been looking into powder coating processes and other painted processes. If I decide to go on with this, I will keep you all updated.
Thanks
Shane
I hope you do I really liked that design and was thinking of getting one this season keep us posted
September 9, 2014 at 2:50 pm #1453131do you have any pics of the vex arm?
and will you make them in just bare alum. with no polish, powder coat, paint, etc?
September 9, 2014 at 2:59 pm #1453133they really look rough without the polishing. I dont know if i would be doing a disservice by offering them unpolished….
September 10, 2014 at 10:17 am #1453378they really look rough without the polishing. I dont know if i would be doing a disservice by offering them unpolished….
Shane email me at [email protected] , I live in Iowa and i can help you out with the polishing aspect for your transducer arms.
September 10, 2014 at 3:00 pm #1453516email sent.
pm sent koonz.
its just a matter of not having the time to polish. the guy that did my polishing is no longer in the machine shop of our business, he is back at the laser. and with me being the lead in the cnc dept., i don’t have the time to sit at the engine lathe polishing because i am busy setting up other machines most of the day. hence why i was looking at faster and more effective ways to get the end result.
my process was to machine, and then debur with chamfer bits & whirly birds & scotchbrite wheels. Then he would use cloth wheels with these polishing compound bricks. one wheel for the grey compound, one wheel for the yellow compound, and then a clean wheel for the mirror finish. he could do about 10 in about 2 hours, which i paid him 5 bucks per set.
as for arms without the polishing, the tool marks are hideous compared to the polished look. I have thought about using these rubber pencil looking things that leave swirls on the material in a patterned fashion, but i cannot afford too much more machine time as it is usually.
I was thinking of making some custom jaws to hold the arms better on the last step, which would reduce some of the chatter marks in the finish process on the cnc mill, but that still leaves me without a polish solution…..
up for ideas if you have them guys….
September 11, 2014 at 8:11 am #1453730I hear ya totally……. I really don’t care if there a little tough looking, I have my own means of polishing if your willing to part with them. if nit I understand! but if you do0 figure something out would you please put them on here IDO so we can purchase them!
thanks !
September 11, 2014 at 12:25 pm #1453790I hear ya totally……. I really don’t care if there a little tough looking, I have my own means of polishing if your willing to part with them. if nit I understand! but if you do0 figure something out would you please put them on here IDO so we can purchase them!
thanks !
will do….
September 12, 2014 at 4:57 pm #1454227Fyi guys, I changed a couple things in the programming today to reduce the cycle time, and the finish actually came out better. 20 minutes machine time for the first side of a set.
Monday I will make jaw pads to hold them more securely for the top side process, and see if I can get a consistent good finish on them with it. If I can, consider it game on for the pure machined look. I will still scotchbrite wheel all sharp corners, but it shouldn’t take away from the machined look if I do it right.
Before, I was only clamping on the sides of the long part so I could use any set of of soft jaws in the machine. The loop that the rubber stopper sits in would hang out of the jaw and vibrate when passing over with the face mill or fly cutter, hence the need to polish them. New jaw pads to enclose that section of the arm should reduce vibration a ton, at least that’s what I am hoping.
If all goes well, arms should be doable, and save customers 5 dollars since I am not having them polished.
If they don’t turn out that well, I may flip the process around and start with the topside so vibration is held to the bottom side (meaning you won’t see it). Guess we will see…
Also, after doing research on painting and powder coating, anyone wanting to do such will want to boil them in water first to ensure all the pores in the aluminum is cleaned out, or else you will have issues with the paint staying on long term…
September 15, 2014 at 2:42 pm #1455034they look like they are gonna turn out just fine…. few more to make just to see if i run into any problems, but i am big time satisfied with how they turned out with my new clamping setup…..

 September 15, 2014 at 3:48 pm #1455061
Shane – throw a 3/32 radius tool in your program and save yourself a bunch of deburring. Your part would basically be finished coming off the machine.
September 15, 2014 at 8:10 pm #1455156Shane – throw a 3/32 radius tool in your program and save yourself a bunch of deburring. Your part would basically be finished coming off the machine.
I thought about that but of I have any alignment off, the radius mill would mess things up. Right now I do 99-100% of the contouring on the first side, and then walk off the rest with the 45 degree facemill….
September 16, 2014 at 8:14 am #1455252<div class=”d4p-bbt-quote-title”>joel-ballweg wrote:</div>
Shane – throw a 3/32 radius tool in your program and save yourself a bunch of deburring. Your part would basically be finished coming off the machine.I thought about that but of I have any alignment off, the radius mill would mess things up. Right now I do 99-100% of the contouring on the first side, and then walk off the rest with the 45 degree facemill….
Not trying to be critical but look at it from the stand point of time & money. Alignment issues are something that can and should be solved regardless of whether or not you use a radius tool.
The time saved translates directly back to the amount of money you make on a part.
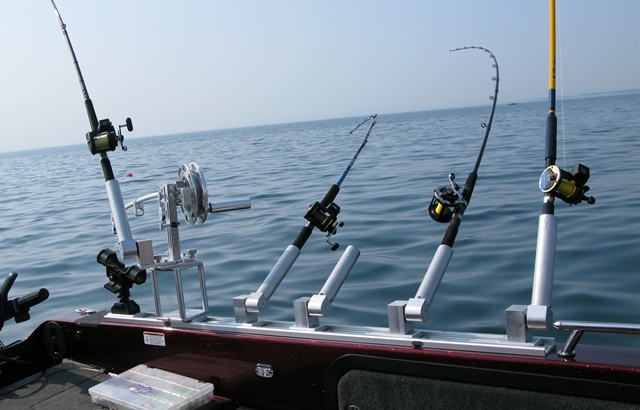
There are multiple solutions to most alignment issues, you just need to figure what’s the best route to go. Adding that radius tool to both sides of the part will save you a lot of time, and in the end, money.Just so you don’t think I’m full of b.s., everything except the track in this photo was designed and machined by me. (including the down rigger) Although its a little hard to see, every part has its edges deburred on the machine. Either a nice radius or a chamfer.
The rod holders are a V1 design. I have every intention of improving them, not to sell but rather just for fun.
Radius tools digging into the part is something that can be resolved without much difficulty.Attachments:
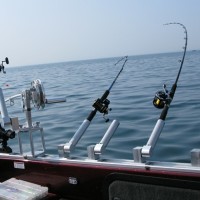
IMG_3052.jpg
September 16, 2014 at 9:16 am #1455278yup, i understand. i know. the problem is trying to get them out on the fly, without keeping them in the machine for too long. sometimes i get a few frowns for doing “government work” lol…..

You must be logged in to reply to this topic.